
Welcome to the most complete guide to building your branded site from scratch. This guide is for those who want to build a branded website (or multiple) from zero to 100. It applies to both absolute beginners and more advanced web developers.
I do not recommend you use platforms like Wix or Squarespace simply because they are closed-source platforms which essentially means: that if they go down, so do your websites… WordPress, on the other hand, is open-source (and free).
Building a branded website with WordPress is not only easy (if you follow the steps) but also provides full control of your assets, designs, and overall website.
Using WordPress in combination with Elementor Pro (a page builder), is what will allow you to design a beautiful branded site that is unique to your tastes and needs.
1. What’s the Purpose of Your Website?
Before diving into the website creation process, it’s important to understand the purpose of your website. Are you creating a website for your business, an online store (e-commerce), a blog, or a personal portfolio? Each type of website serves a different goal and requires a specific design and content strategy.
Knowing the purpose of your website will help you make informed decisions about its layout, features, and target audience.
Types of Websites and Their Purposes
Blog Website: Focuses on sharing informative and engaging content with readers, requiring a clean and organized layout for effective showcasing of blog posts.
Online Store (E-commerce): Offers a platform for selling products online, requiring comprehensive e-commerce solutions to facilitate online transactions and customer engagement.
Personal Portfolio: Showcases an individual’s work and achievements, requiring a visually appealing and functional layout to highlight personal skills and projects.
Different types of websites dictate the content, layout, and features needed.
Website Goals (and Style)
To build a successful website, start by setting clear goals to guide design, content, and marketing efforts. Whether it’s to generate leads, sell products, share information, or build a community, defining these objectives helps measure success through metrics like traffic and engagement.
Think of what typography you want to use and the color palette you will be implementing as your brand/website colors.
Every branded website needs a nice font and an analogous color palette!
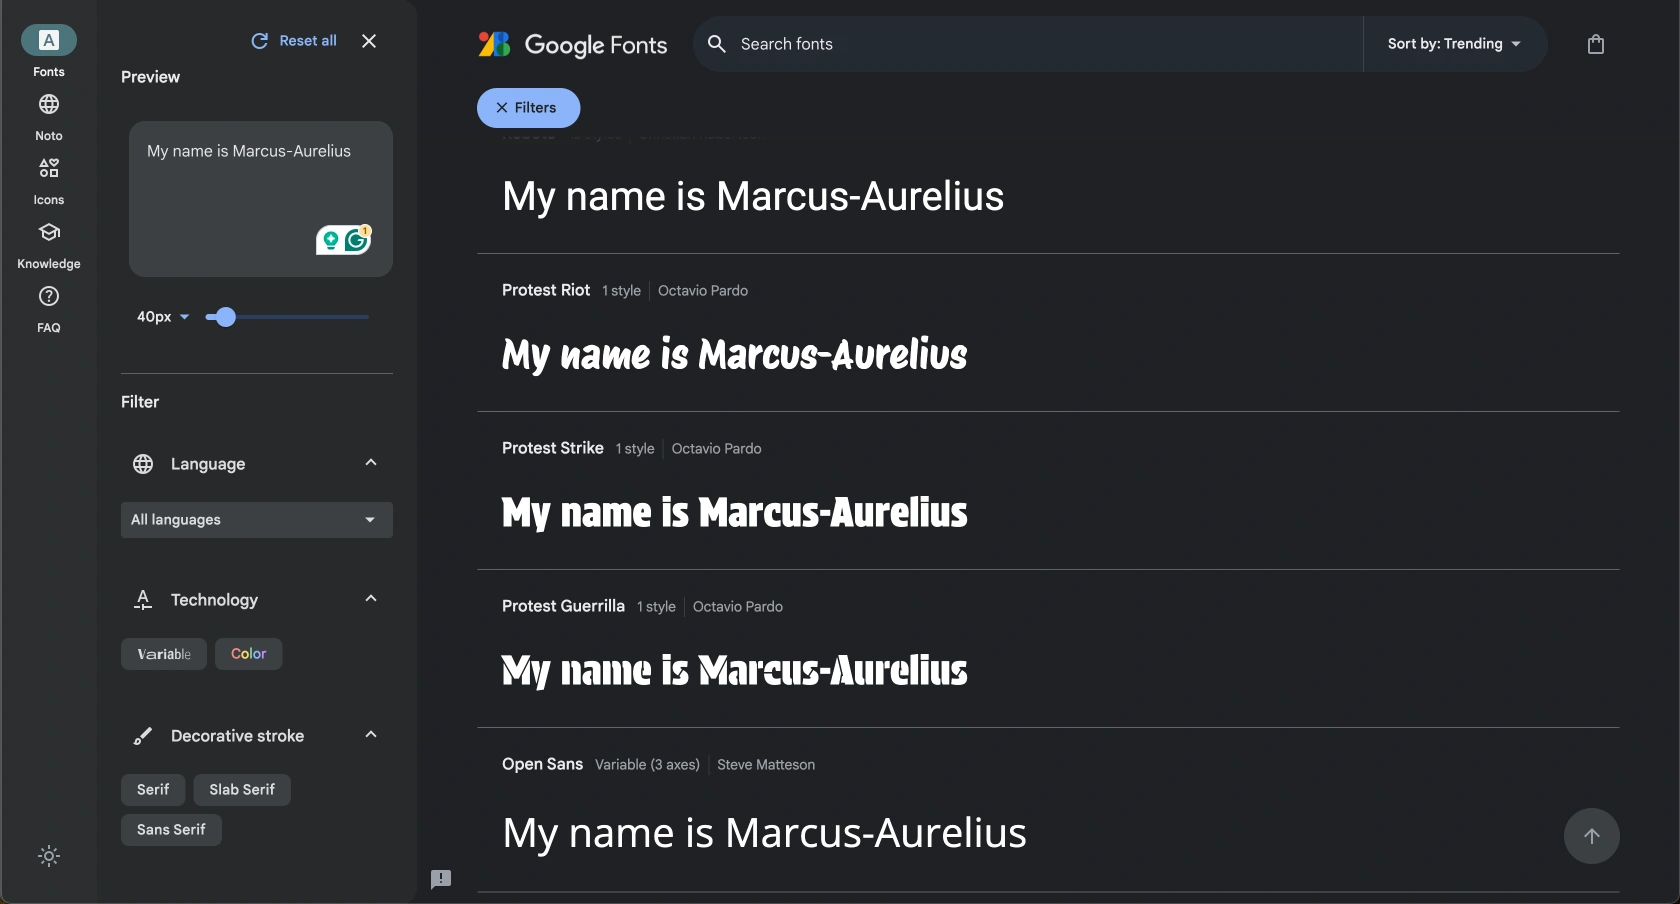
For Typography, I like to browse Google Fonts for ideas – it’s free. Try to only select a maximum of 2 fonts for your website. Or else, it will look a little funky.
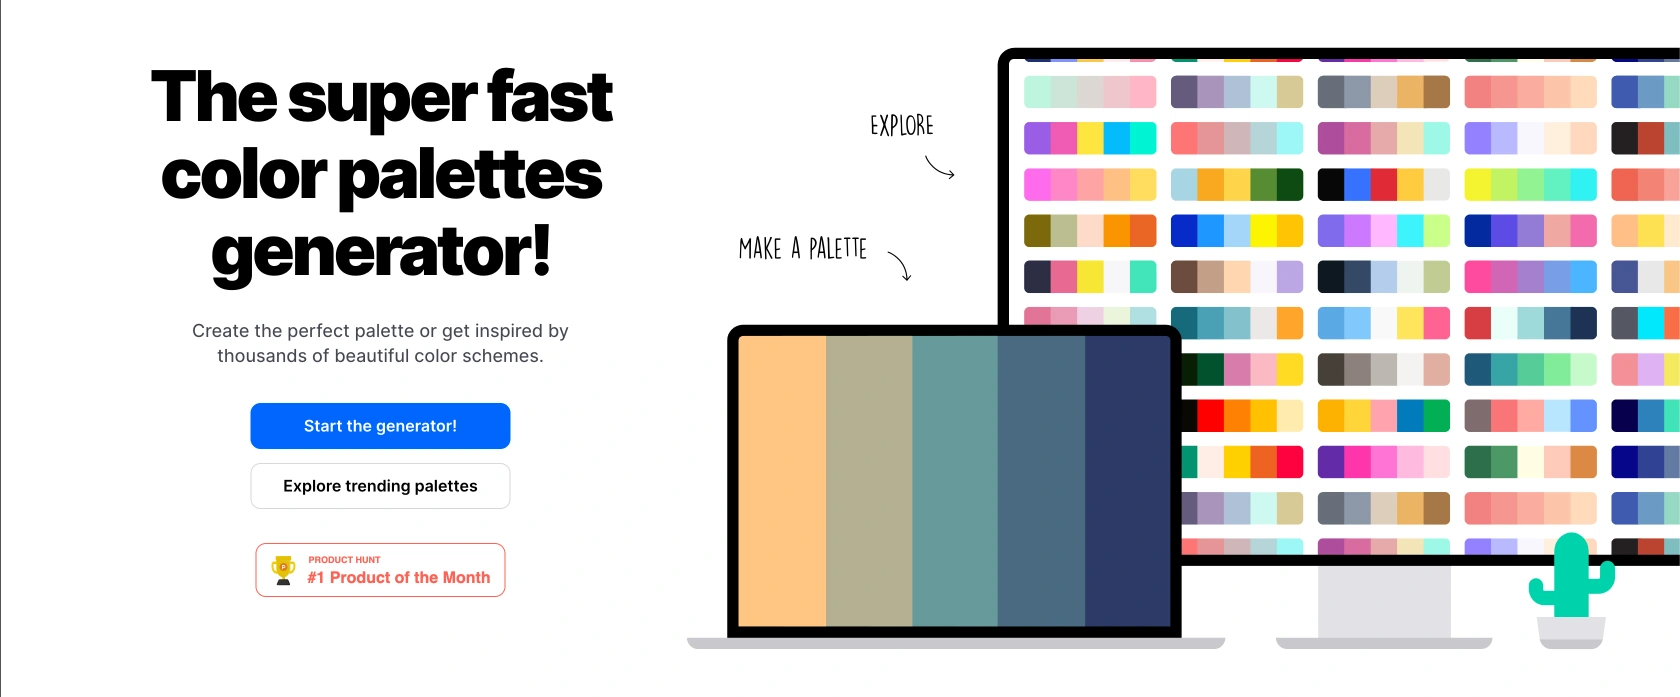
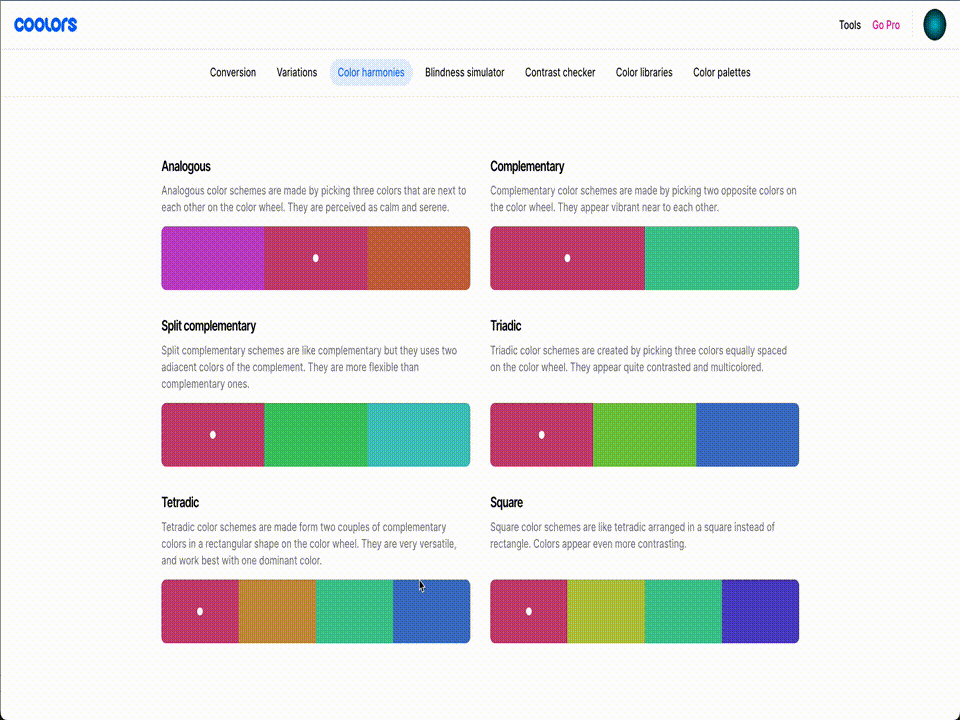
For colors, I love to use the Coolors tool. It is mostly free to use and works great for finding beautiful color palettes.
Hover on “tools” and select “color picker”

Select your color options and choose a color. If you have a color in mind, you can type it in using the “name” options or add the HEX code.

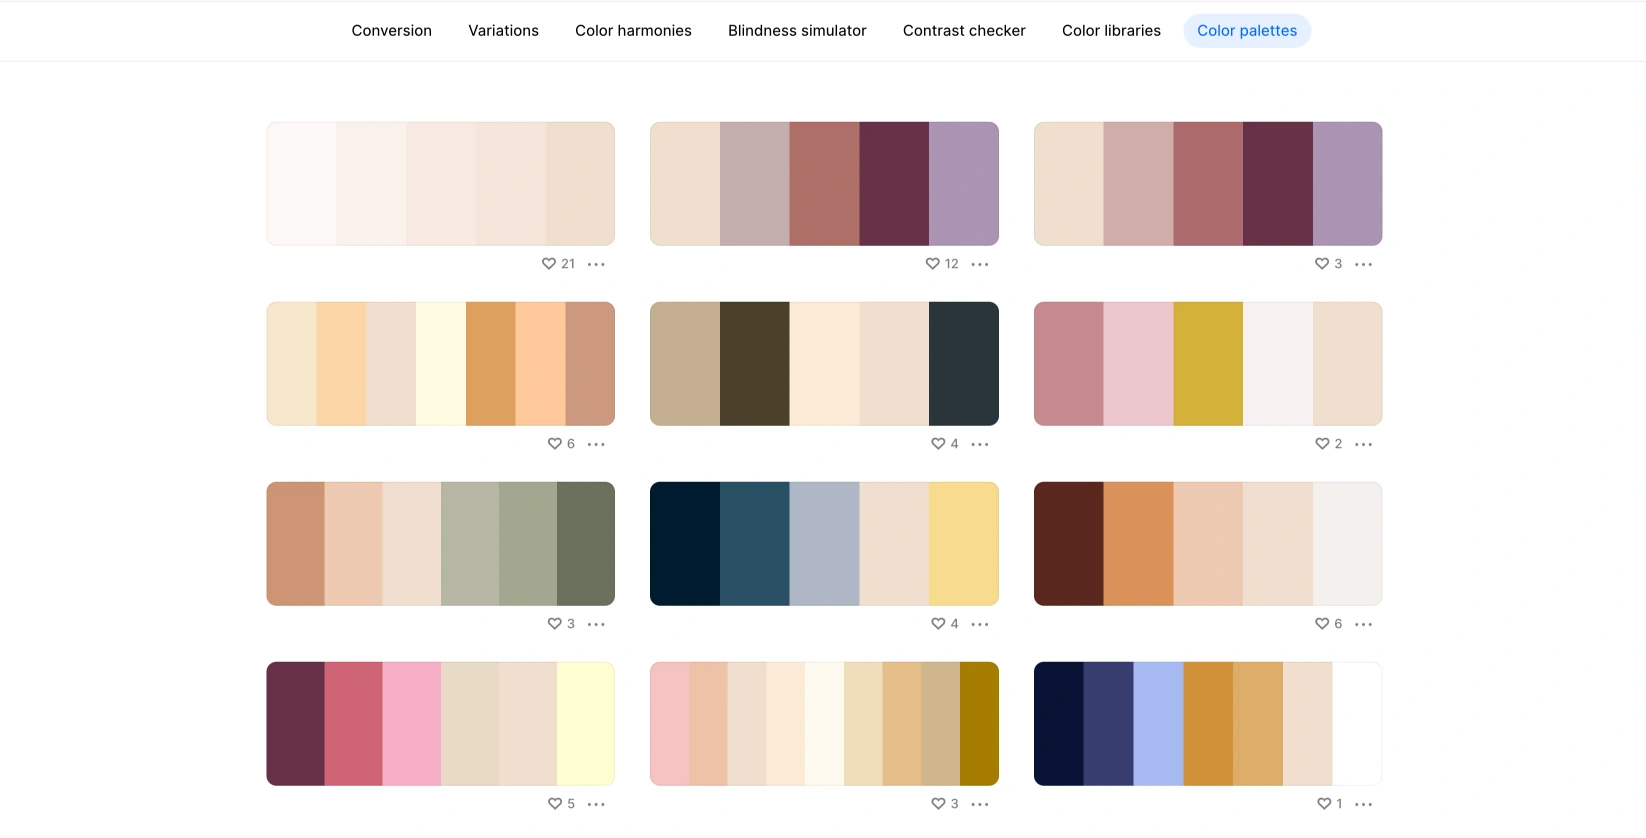
Once you’ve selected your color, you will be provided with a page full of color combinations, harmonies, variations and more. Including various color palettes. Make sure to save these for later!
2. Selecting a Domain Name
You cannot have a website without a domain name. A unique online address.
The best practice is to choose a domain name that reflects your brand, is easy to remember, and aligns with your website’s purpose.
Importance of a Good Domain Name
Several reasons make a good domain name important:
A good domain name boosts visitor trust, enhances user experience, and contributes to website professionalism.
It should be memorable, easy to type, and pronounce, avoiding numbers for clarity.
Including relevant keywords can improve search engine visibility and organic traffic.
A domain that aligns with your brand strengthens your online identity and aids in customer acquisition.
Tips for Choosing the Perfect Domain Name
When choosing a domain name for your website, consider the following tips:
- Consider simplicity and easy pronunciation when choosing a domain name.
- Choose a domain name that stands out and is easy to recall, making it more likely for people to share and recommend your website to others.
- Use relevant keywords in the domain name for search engine optimization.
- Ensure the domain name aligns with your brand and business identity.
- Research domain availability and consider alternative domain extensions.
Try and go for a .com domain as those are usually the most powerful.
Where to Get Your Domain?
Usually, you would think to go somewhere like Godaddy or a similar domain registry to acquire your domain name. You could, but then you would have to transfer the domain to the web hosting and this can be an annoying and unnecessary process.
So, we will be getting the domain directly from the hosting provider in the next step.
(Advanced) Pro SEO tip: If you are not sure what domain to get, budget isn’t an issue or looking for a domain that already has age, high domain authority and domain rating, consider buying one from Odys.global. Honestly, it’s what I would do.
3. Getting Your Web Hosting (and Domain)
Once you have chosen a domain name, the next step in creating your website is getting a web hosting provider. Web hosting is the service that allows your website to be accessible on the internet.
In this section, we will explore what web hosting is, why it’s important, and what web host to get for the best performance because not all web hosting companies can be trusted.
What is Web Hosting?
Web hosting is a service that provides the server space and technology necessary for website storage and online access. When you create a website, it consists of various files, including HTML, CSS, PHP, and media content, such as images and videos. Web hosting services store these website files on powerful computers called servers, making them accessible to users via the Internet.
In simple terms, this is where all your stuff will be stored (think of it like a hard drive). You don’t need to worry about this right now.
Factors to Consider When Choosing a Web Host
When selecting a web host for your website, these are the most important factors:
Reliability, security, and support.
Normally, when choosing a reliable web host as a noobie, you would:
Have to investigate, check for reviews, and examine their hardware, network, and data center quality to ensure optimum performance.
Prioritize scalability, bandwidth, PHP memory, and storage to accommodate your site’s growth.
PHP is probably the most important. Especially if you are building a website using a page builder like Elementor. One of Elementor’s specifications is that your PHP memory limit is equal to or above 512MB.
If your PHP memory limit is below this amount, you may come across issues in the long run.
Opt for a host with an easy-to-use control panel like cPanel or Plesk for straightforward site management.
Read reviews and compare hosting plans to help you find a service that meets your website’s needs and budget, ensuring secure and efficient hosting.
Or, you could simply trust me when I say, I’ve been there, I’ve done the research and I have used each of the following host providers that I am about to recommend below. All are recommended WordPress hosting providers.
SiteGround ⇒

Use SiteGround if you are:
- Located anywhere in the world
- New or advanced to Web Hosting
- Looking for complete service (domain and hosting)
- Planning to only build one website
Best qualities include:
- 24/7 support
- Free domain name with your hosting plan
- Same price for both WordPress and Woocommerce (E-commerce)
- Professional emails (free with a hosting plan)
- User-friendly user interface
- Multilingual interface and support
- Free CDN
- Automatic website and email backups (daily)
- 728 MB memory limit (all plans)
- 10 GB Webspace
- Built-in email marketing (extra €9.99 per month)
*I recommend you use SiteGround if you are planning on creating only a single website*

DinaHosting ⇒

Use DinaHosting if you are:
- Located in Spain or Europe.
- Relatively new to Web Hosting
- Looking for complete service (domain and hosting)
- An individual or freelancer
Best qualities include:
- 24/7 support over the phone, email or chat on their website
- Same price for both WordPress and Woocommerce (E-commerce)
- Professional emails (free with a hosting plan)
- User-friendly user interface
- Multilingual interface and support
- Automatic website and email backups (monthly)
- 100 GB Disk storage
- 512 MB memory limit in advanced plan
*Make sure to select the Advance hosting plan*
You could also get your hosting directly from Elementor ⇒
Getting Your Hosting and Domain
Since we want a server that excels in speed and cybersecurity. Plus, has a large PHP memory. we will be going for SiteGround!
Go to siteground.com and select a plan. Here, you can also select wether you want an standrad WordPress plan or a WooCommerce plan (for the same price)
Enter your domain name. (SiteGround provides you with a free domain name for the first year)
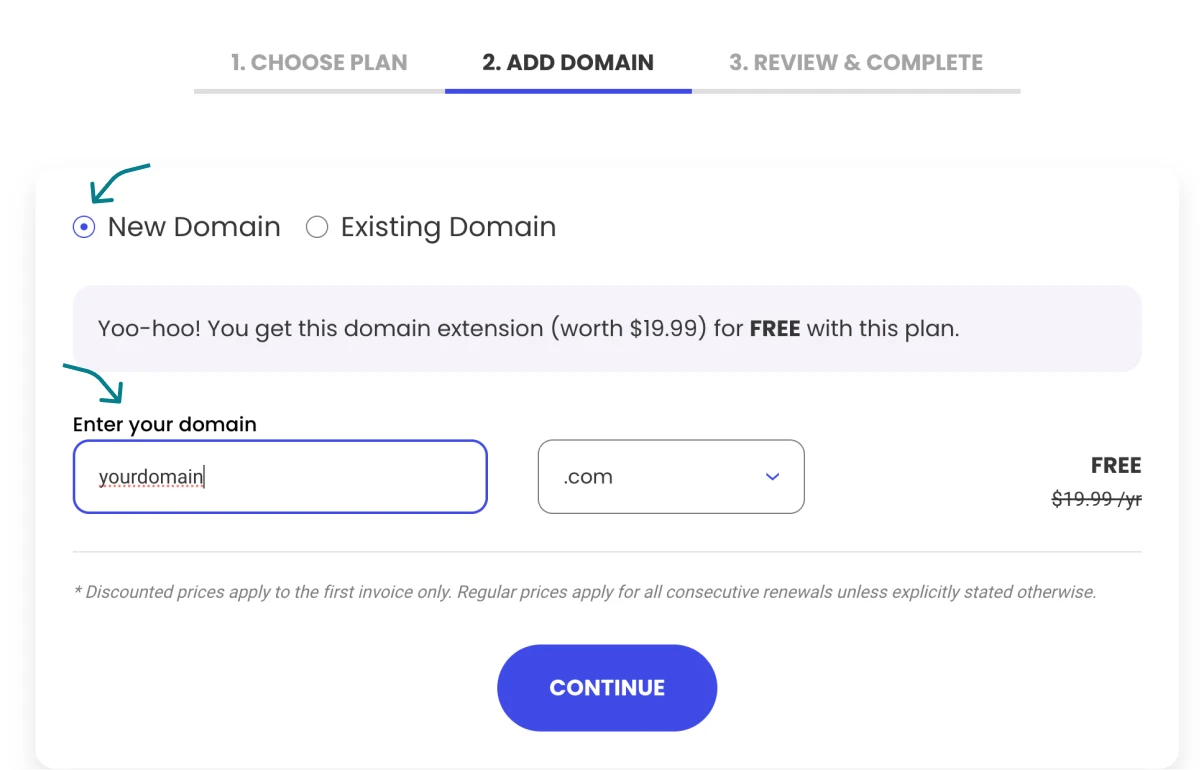
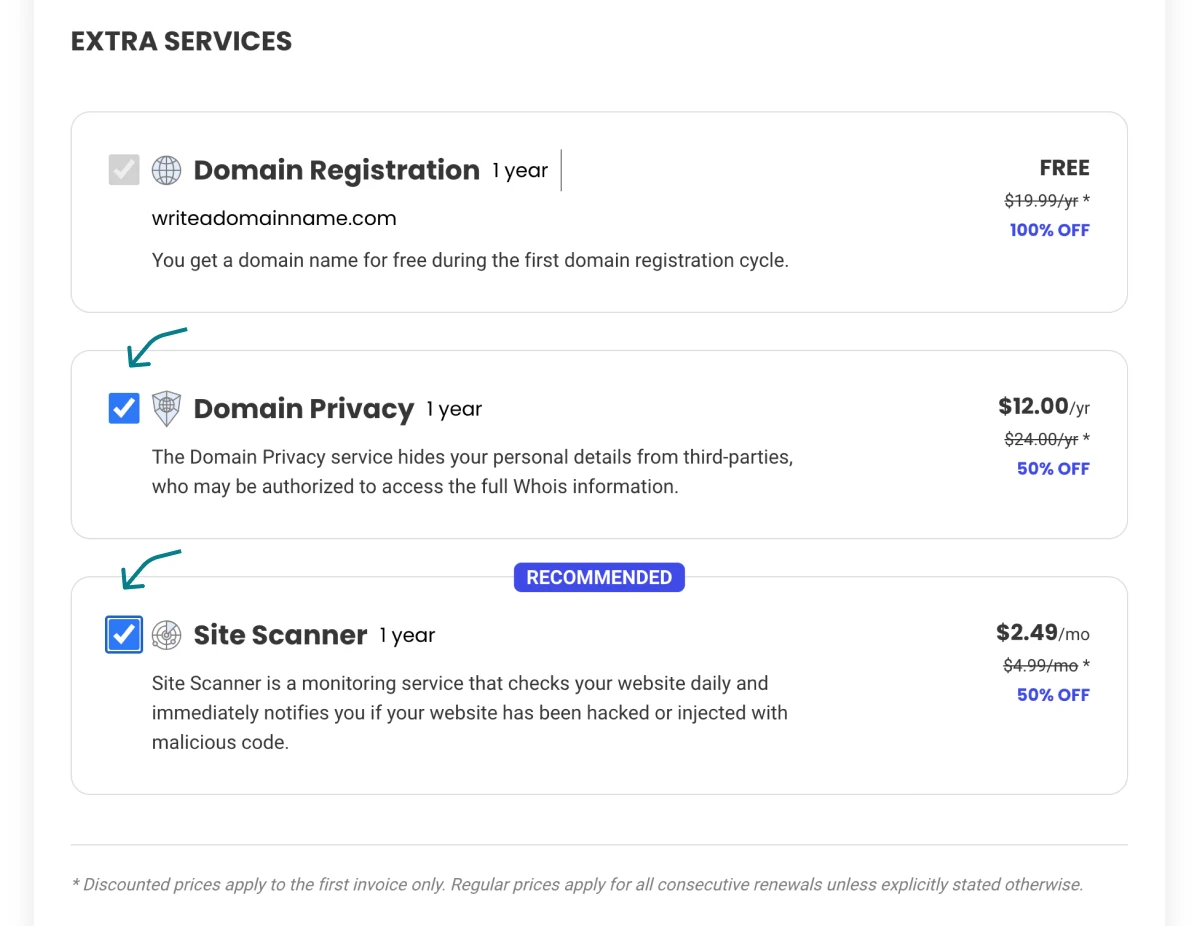
If your domain name is available, continue by selecting the recommended options (optional).
Continue the steps and complete your purchase.
Before You Move on
Make sure you:
- Add an SSL certificate to your domain. This will ensure a safe and secure connection between your website and visitors. You have a free one available which is called “Let’s Encrypt”. You should be able to easily select it.
- You will have access to 24/7 chat support, so take advantage of this if you have any questions or doubts.
- Do not mess around with anything on the server itself unless you have to.
4. Building Your Website on WordPress
Once you have secured a domain name and web hosting, it’s time to start building your website. WordPress is a popular choice for website creation, as it offers a powerful content management system (CMS) and complete control of all of your site parameters.
Why Choose WordPress?
Did you know: 62.8% of all websites are on WordPress!¹
WordPress is a flexible and user-friendly content management system. It allows you to create any type of website, from a simple blog to a full-fledged business website or online store. Here are some reasons why WordPress is a great choice for building your website:
1. Adaptable to changing needs
2. User-friendly—Even for Beginners
3. Plugins Expand Functionality
WordPress plugins can be activated, deactivated, and uninstalled as a site changes. This versatility lets you tailor your website to your needs.
4. WordPress Sites Rank High
5. WordPress is mobile-responsive
6. WordPress Blogs Are Built-In
Installing WordPress on Your Host
Installing WordPress on your web host is a simple process that can be done in a few simple steps.
If you went for the SiteGround hosting plan we recommended above, visit their help center, it is super easy! (it is a similar process for most other hosting providers).
5. Customizing Your Website with Elementor Pro
Elementor Pro is the best page builder plugin for WordPress. It allows you to create stunning, custom-designed websites without any coding knowledge.
It is compatible with almost all important plugins and tools that will help you optimize your site in the future. And, you can use it to build any type of website.
Plus, if you keep reading our guide, we will show you a little trick that will speed your website-building process by 100x!
Downloading Elementor Pro
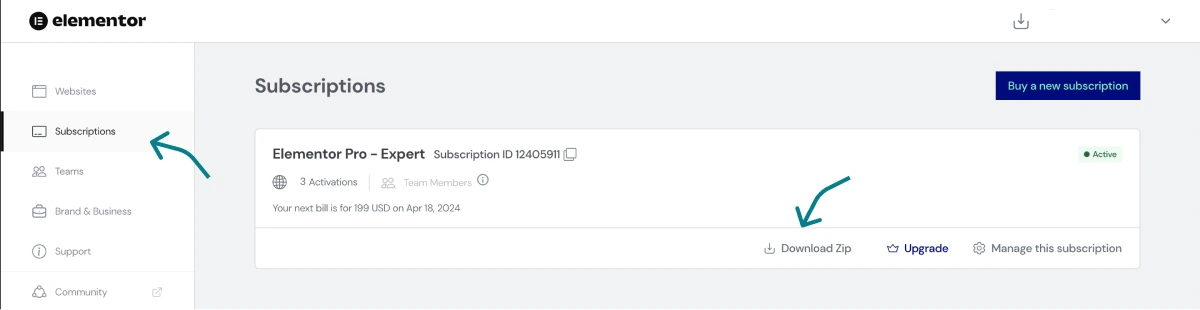
First things first, head over to the Elementor Pro website.
Select the plan that best suits your needs.
In this case, we will select the “advanced” plan to have access to all the features.
After purchase, login to your Elementor account. Go to Subscritpions -> Downlaod Zip.
Then go to your WordPress dashboard and go to Plugins -> Add New Plugin -> Upload Plugin.
Access your dashboard by entering the URL: www.youdomainname.com/wp-admin.
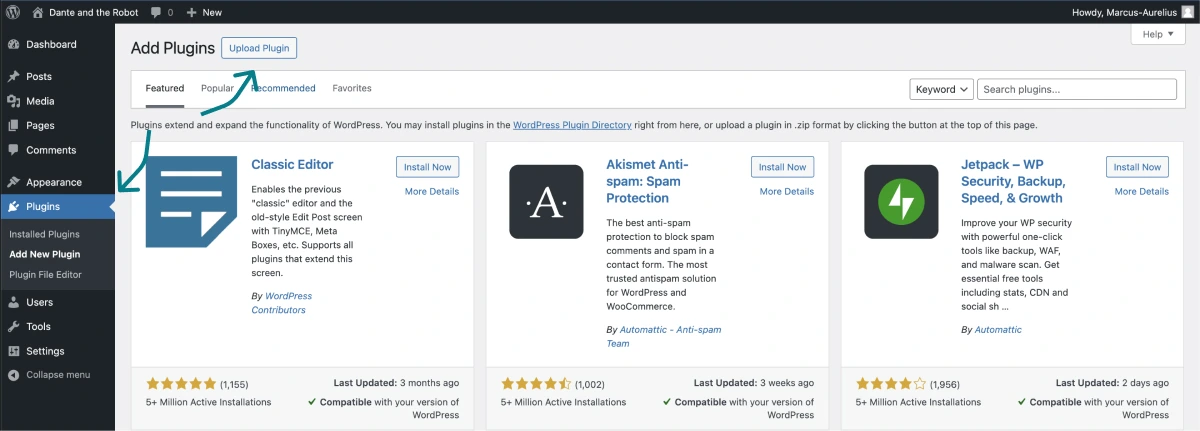
Browse your computer and upload the Elementor Pro zip file you just downloaded. The file should look like something like: “elementor-pro-3.19.2.zip”
You can go ahead and “install” and “activate” Elementor Pro. Elementor does not work without the standard Elementor plugin so go ahead and install that too.
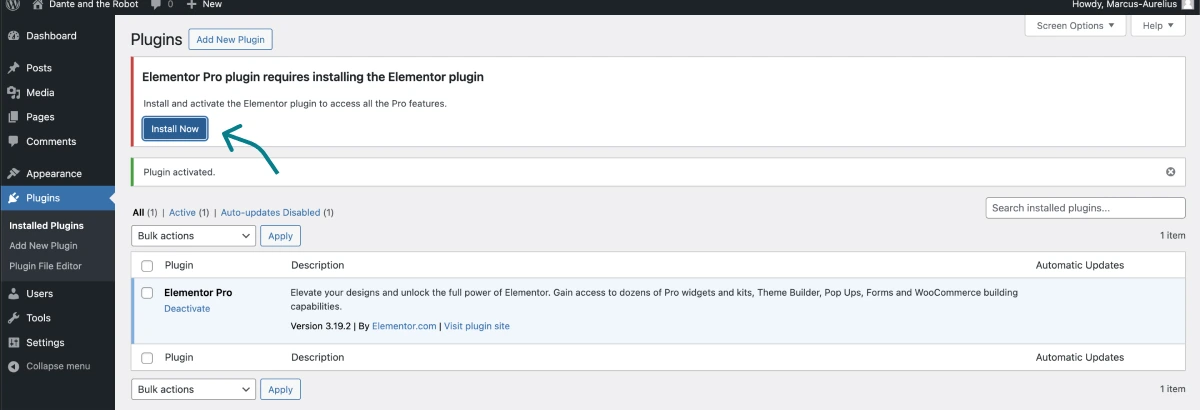
Now you are ready to create a beautiful website!
Create Your Pages
With Elementor Pro, creating pages for your website is a breeze.
The drag-and-drop editor allows you to easily add and arrange elements, such as text, images, videos, buttons, and forms, on your pages.
Pro tip: You can copy and paste whole section using Skelementor (more about that as we design our pages).
But first, let’s create your pages.
Go to “Pages” and “Add New Page”.
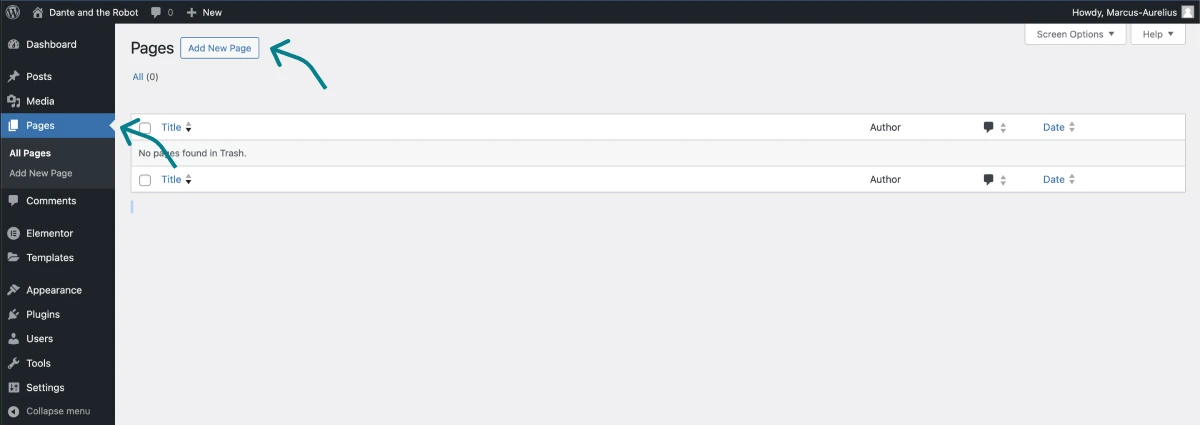
Call it “Home” and Publish.
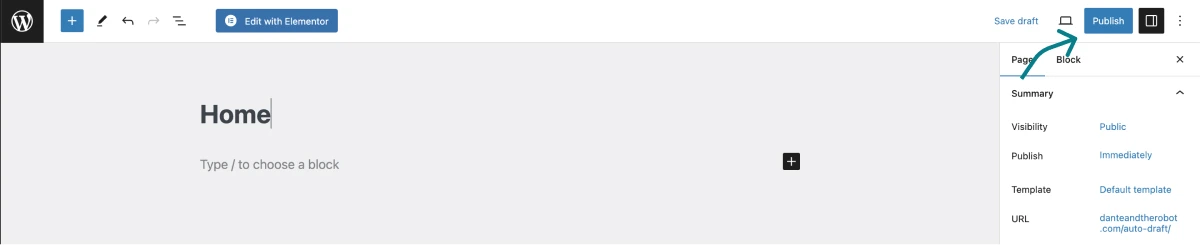
Do it once more for your Blog page
The Blog page, regardless of the type of website you are building, is an essential part of any website. This is where you create valuable content that will attract organic traffic from search engines later on when you are more advanced! Visit our knowledge base to learn more.
Repeate this process for the rest of your pages you want to add (Contact page, About me page etc.)
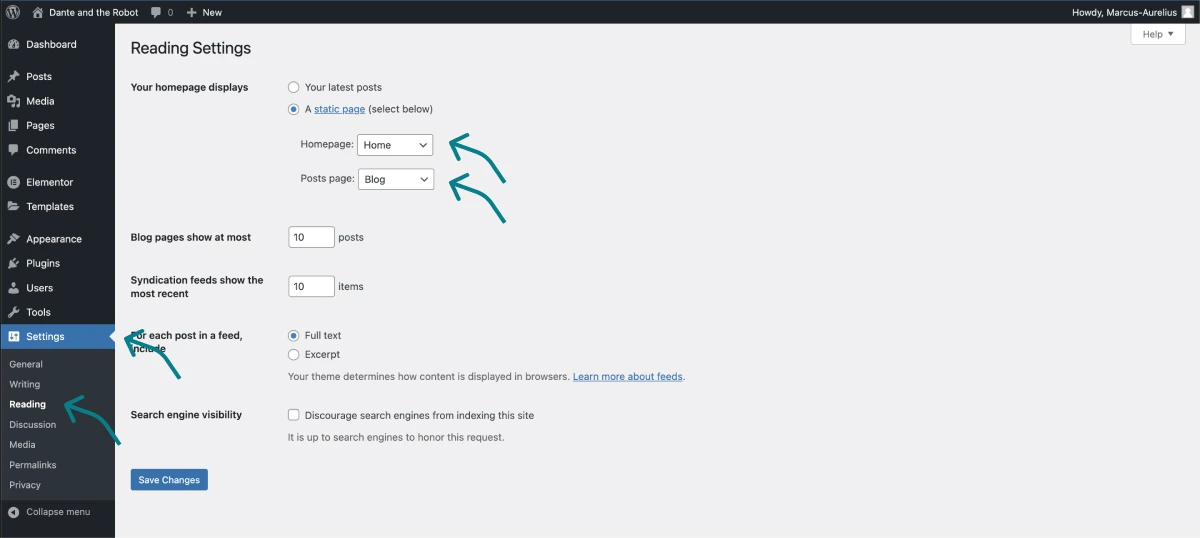
Now, you have to tell WordPress which page is which for best functionality. Go to “Settings” -> “Reading” -> make sure to set the home page with your “Home” page and post page with your “Blog” page.
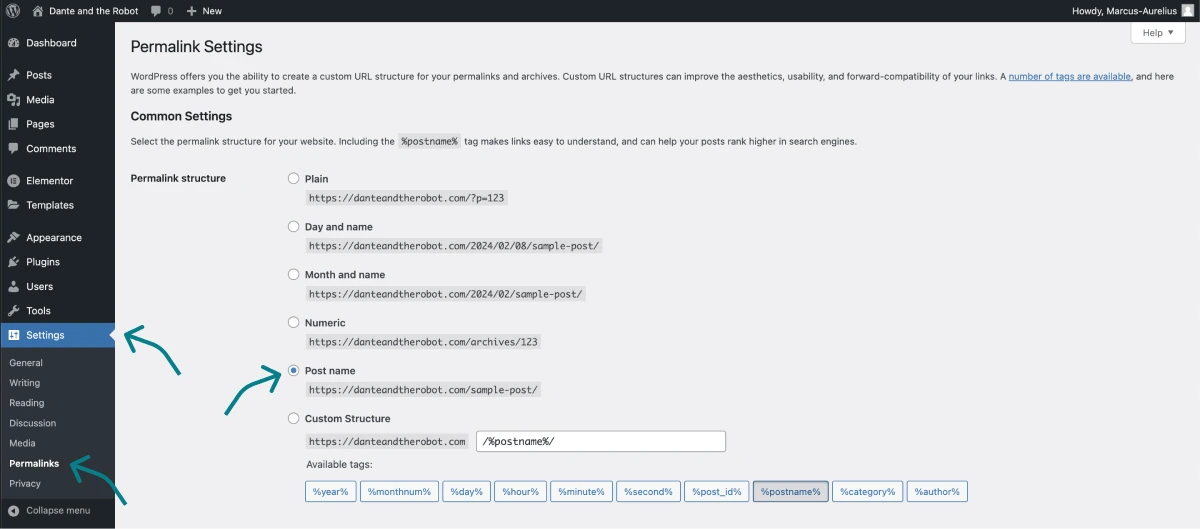
Important: Head over to “Settings” -> Permalinks -> and make sure it is set to “Post name”. This ensures that your URLs are easier to read.
Note: If you are building an E-commerce store (online shop) you will need to download the WooCommerce plugin. Once you download the WooCommerce plugin, Elementor Pro will automatically create all of your necessary e-commerce pages like the Cart page, the Checkout page, the Shop page, etc.
Customizing Your Global Site Settings
Now that you’ve created all the pages you need for your website, it is time to configure some important settings!
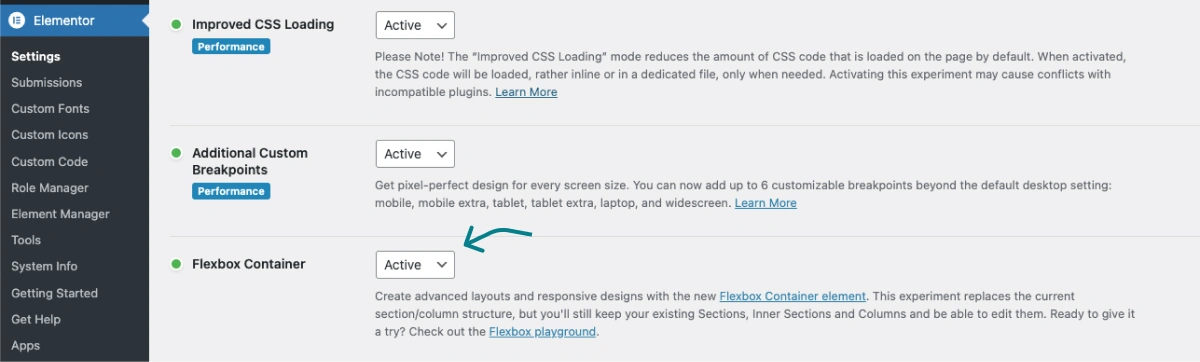
Important: We will be designing our page layout using the “Flexbox Container”.
To configure it, go to the WordPress dashboard. The keyboard shortcut is Comand/Control – E and type in “Dashboard”
This will send you back to the WordPress dashboard.
Now, to configure the Flexbox container feature, got to “Elementor” -> “Settings” -> “Features” -> Scroll down to “Stable Features” -> make sure “Flexbox Container” is set to “Active” -> hit save.
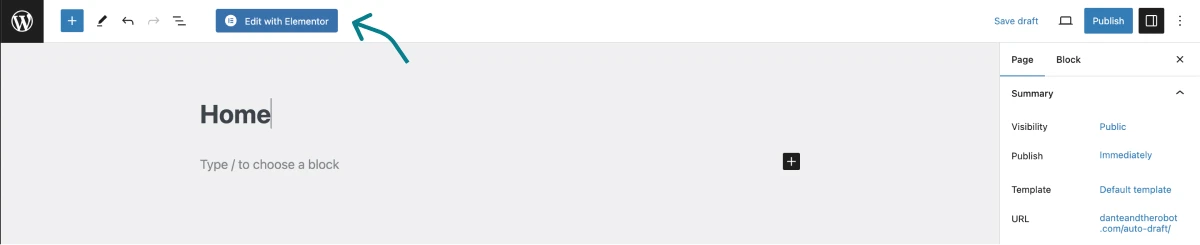
Next, let’s open a page by going to “Pages” -> Select a page -> “Edit with Elementor”
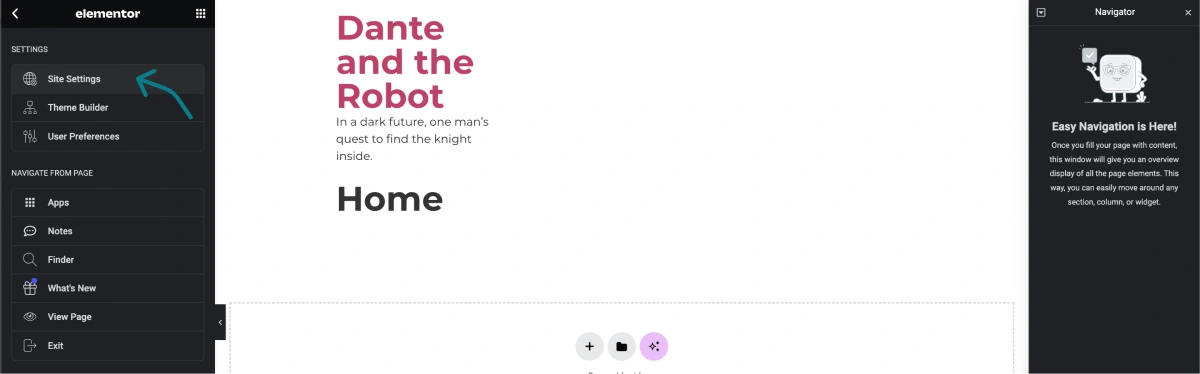
Before doing any editing, let’s configure the “Site Settings”.
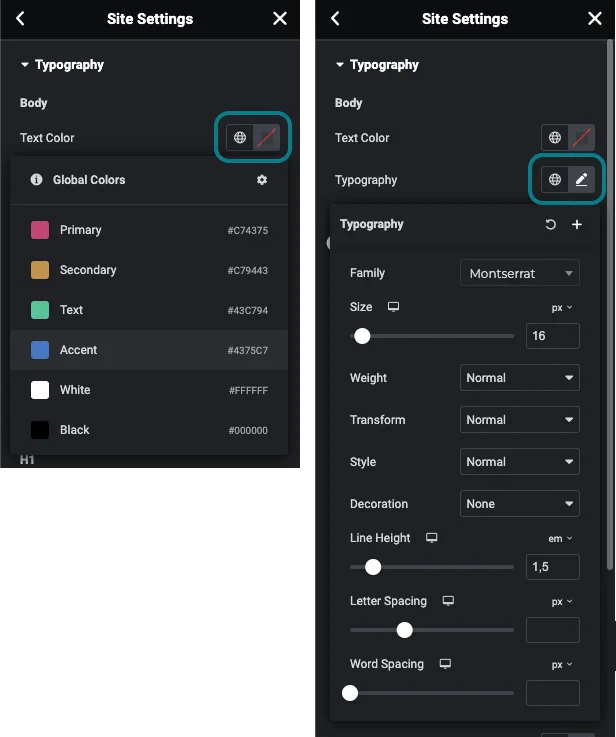
In the Site Settings, we can add our global site colors, select the fonts we will be using for the entire site, and add our logo and favicon.
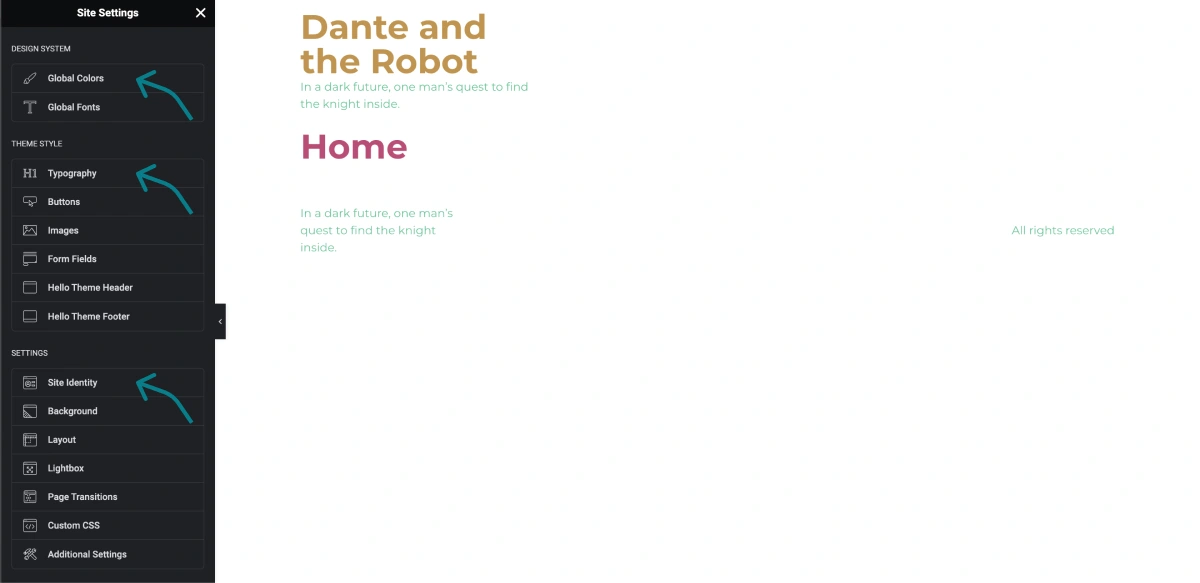
This makes everything much more user-friendly as we will be using the same colors and fonts all over the site.
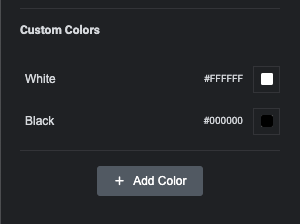
Using the color palette we found with Coolors.co, copy and paste them into your “Global Colors”.
Add a few extra colors like white or black (or be creative and continue to add colors from Coolors.co!
Now, Typography! This is where we configure the fonts for headings and body text. This will apply to the entire site. Let’s work on the body text first.
Select a body text color (preferrably a dark color if your are working with a white background)
And, select the “font family” you want to use. The most used size in pixels for body text is 16px, I then configure the Weight, Transform, Style and Decoration to be either “normal” or “none”.
Line-height is up to you, but I tend to set it to 1.5em.
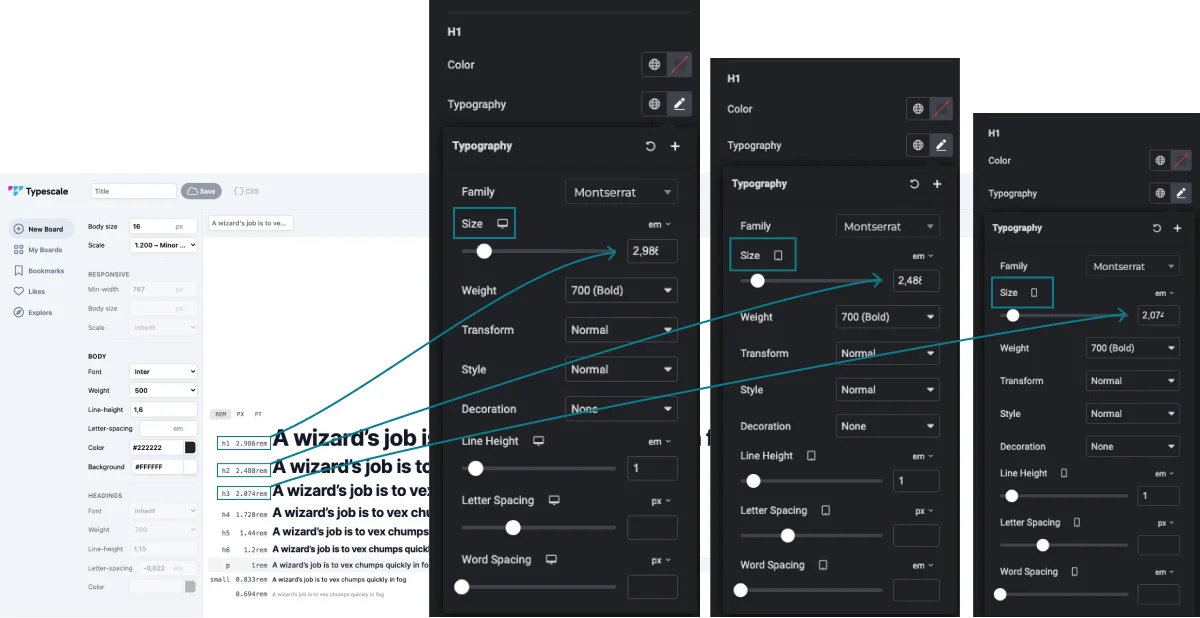
Now, the headings. This part is a little tricky for beginners as we will be using “em” measurements. But, if you just copy my strategy, you’ll do fine!
Using a typography generator tool, you can easily configure all your headings to ensure that they follow a scale to enhance the visual hierarchy.
As seen in the image below, for the desktop H1, we will input the H1 value provided by the typography generator. Then, as we go down a viewport (tablet), we go ahead and add the H2 value, and of course, we add the H3 value to our mobile viewport.
These are all H1 headers, just different viewports. This ensures that for every decive, the H1 value is smaller allowing for a responsive design.
Repeate this process for the H2 and H3 headings. Making sure the desktop H2 is the H2 value from the typography generator and then moving down a heading value for each viewport (tablet and mobile).
Add your logo and favicon in the “Site Identity” section.
Designing Your Page Layout
It’s about time…
Let’s design a page together.
You can apply this process to all your other pages.
If you are still on the “Site Settings” page, make sure you click “Update” in the bottom left corner and exit the page. This will take you back to the Home page.

Now, let’s add some sections to the Home page…
Elementor Pro makes it easy to create a page layout. With the click-and-drop functionality, it simplifies and speeds up the design layout process.
There are many widgets available that you can implement and will enhance your website’s functionality. But, to keep it simple, we will stick to the most used ones (Heading, Text editor, Image, Icon, Container, and Button).

Note: Please make sure you have the Flexbox container activated. This was mentioned earlier.
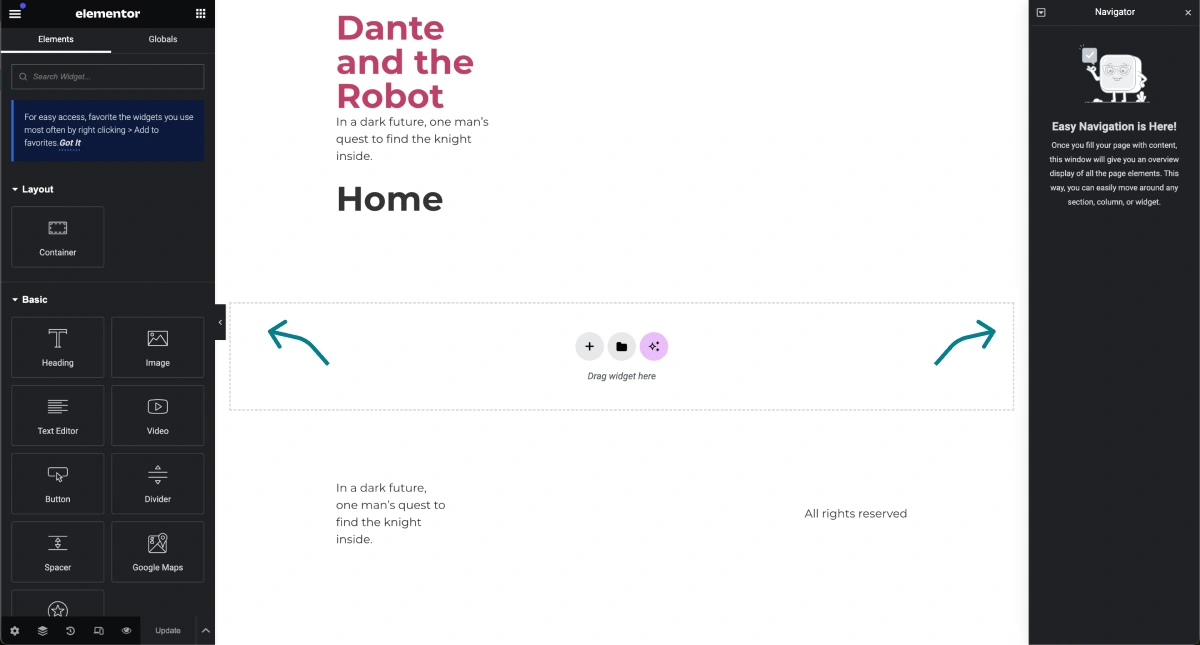
Now, you should be on your Home page. And it should look something like this: The Elementor Pro widgets on the left and the navigator menu on the right.
In case your navigator menu is not open, the keyboard shortcut is: “Cmd/Ctr – I”
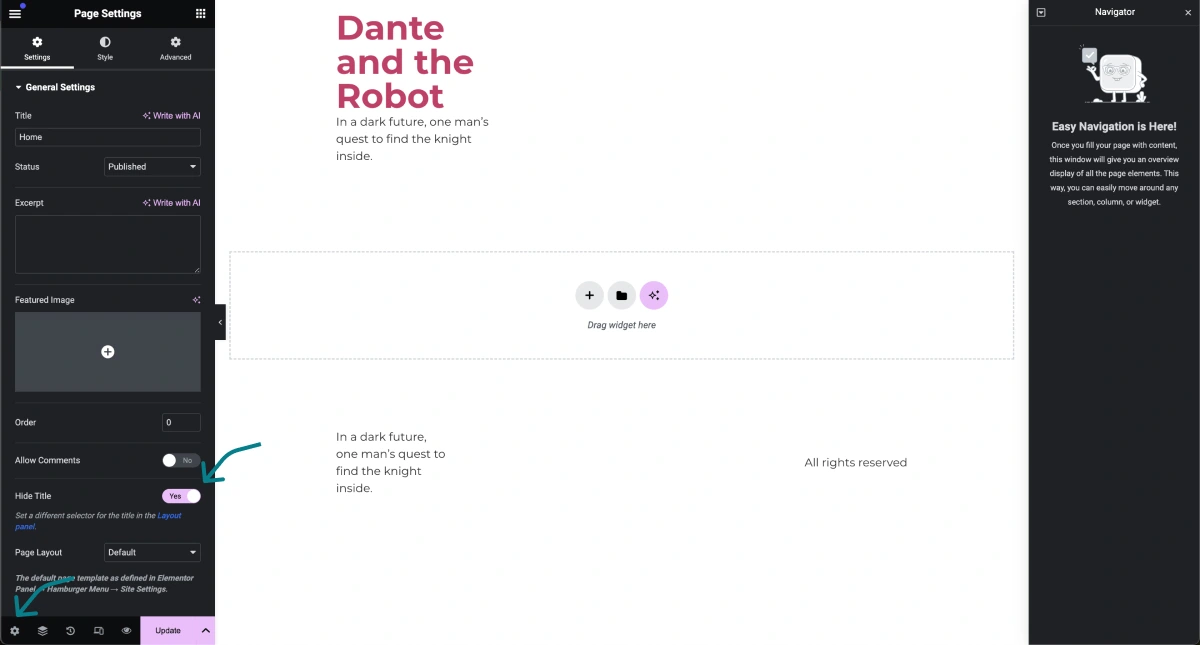
The first thing I like to do is remove the page name.
Go to the page settings (bottom left) and check the “Hide Title”
Now, you are ready to start designing your page layout!
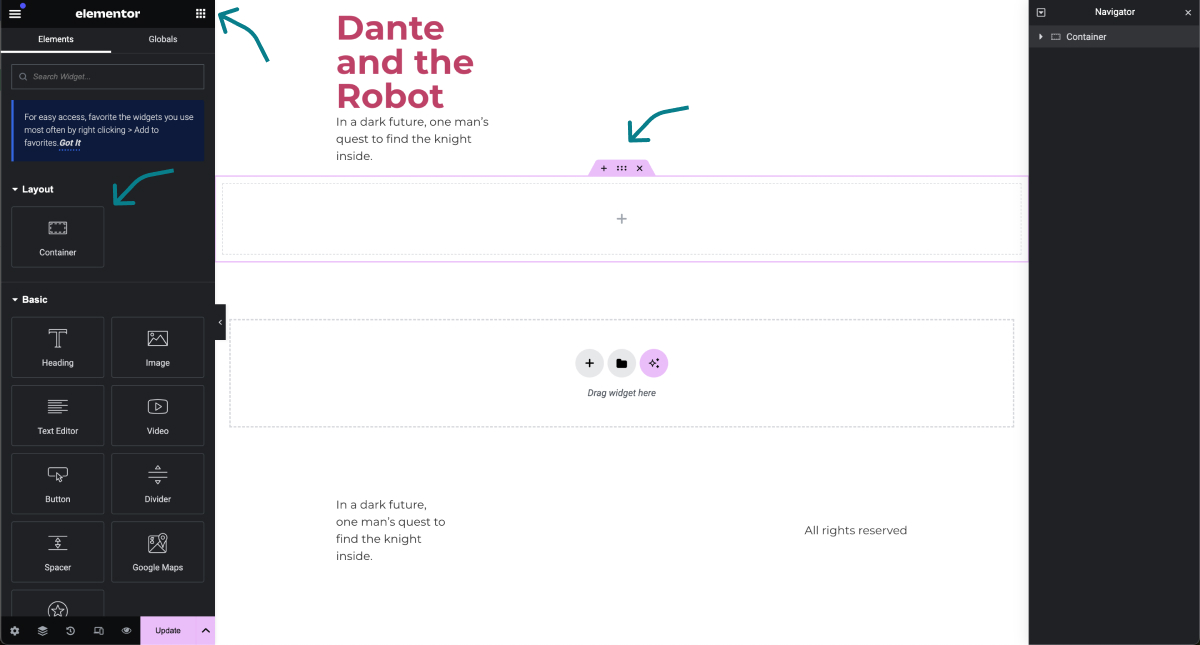
When using flexbox containers, you have to think of them as boxes. In Elementor they are called “Containers”. It is within these boxes (Containers) that we add the necessary information or widgets to create our layout. So, we must first begin by adding a Container widget – this will be known as the main wrapper.
Let’s begin by adding our first container widget.
Click the widget icon on the top of the page and then simply click on the “Conatiner” widget. You will see it appear on the page and in the Navigator menu on the right.
This is where you will be adding your other widgets like images, headings, text, buttons, and more containers.
Important: You need to have some basic knowledge of how Elementor Flexbox Containers work.
Here is the breakdown:
Flexbox Containers work using direction, alignment, and justification. This essentially means that anything you put into the containers will respect whatever options you select. For example, let’s add a heading, text editor, and button widget within our container.
Select the container, click on the widget icon, and click on the “Heading” widget. This will add it within the container
Repeat this process for the “Text Editor” widget and the “Button” widget.
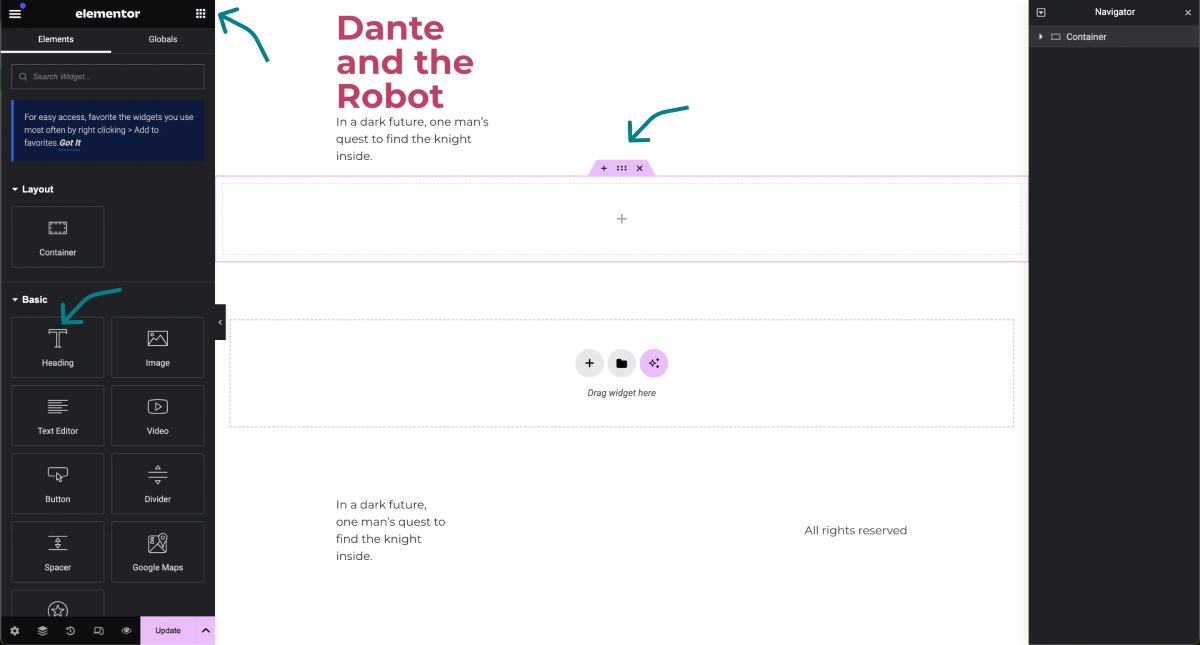
Now, you should have a “Heading”, a “Text Editor”, and a “Button” widget inside of your Container.
Play around with the FlexBox settings to see how the widgets behave inside of your Container. This will give you an understanding of how FlexBox works.
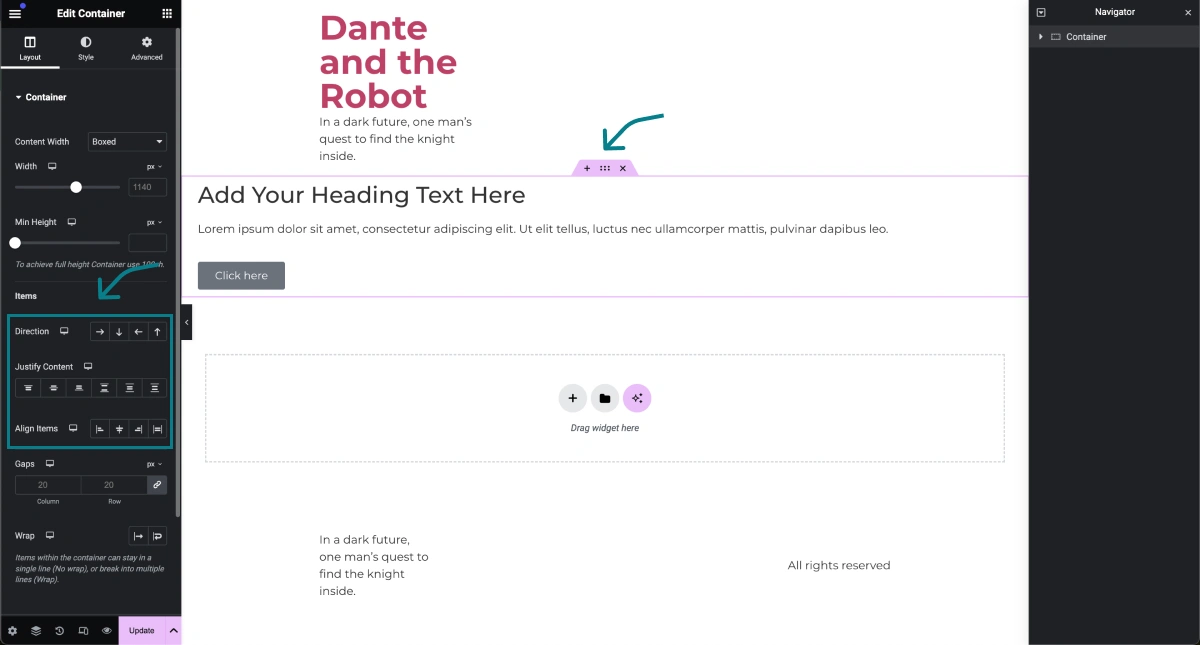
Direction: This is the direction in which your items inside of the container will be stacked, by default it is “Column Vertical” ↓
Justify Content: This aligns items along the main axis of a flex container. It manages the distribution of extra space or aligns items.
Align Items: This controls the alignment of flex items on the cross-axis, similar to how “justify-content” aligns items along the main axis.
I suggest you play around with these controls and familiarise yourself in terms of how they work. You can also head over to Elementor Pro’s playground and test it out in more detail – get some practice.
Once you understand the fundamentals of FlexBox container in Elementor, you can create amazingly beautiful websites that are both user-friendly and responsive.
There is no limit as to what you can do with the FlexBox containers!
So, at this point, you have two choices…
- Familiarise yourself with the FlexBox container to create amazing sections, layouts, and responsive designs (recommended). OR
- Keep reading this guide and see how you can skip the learning and go straight to building your web pages easily using an Elementor-specific tool (it’s free).
Building with Skelementor 100x Faster
Skelementor is a website that was built specifically for Elementor Pro users. It is made up of ready-to-use sections, containers, and layouts for you to seamlessly add to your web pages. This tool is great for beginners who don’t fully understand how the FlexBox containers work (or for those too lazy to learn).
Let’s see how it works.
First, head over to Skelementor, create a free account and come back to this guide.
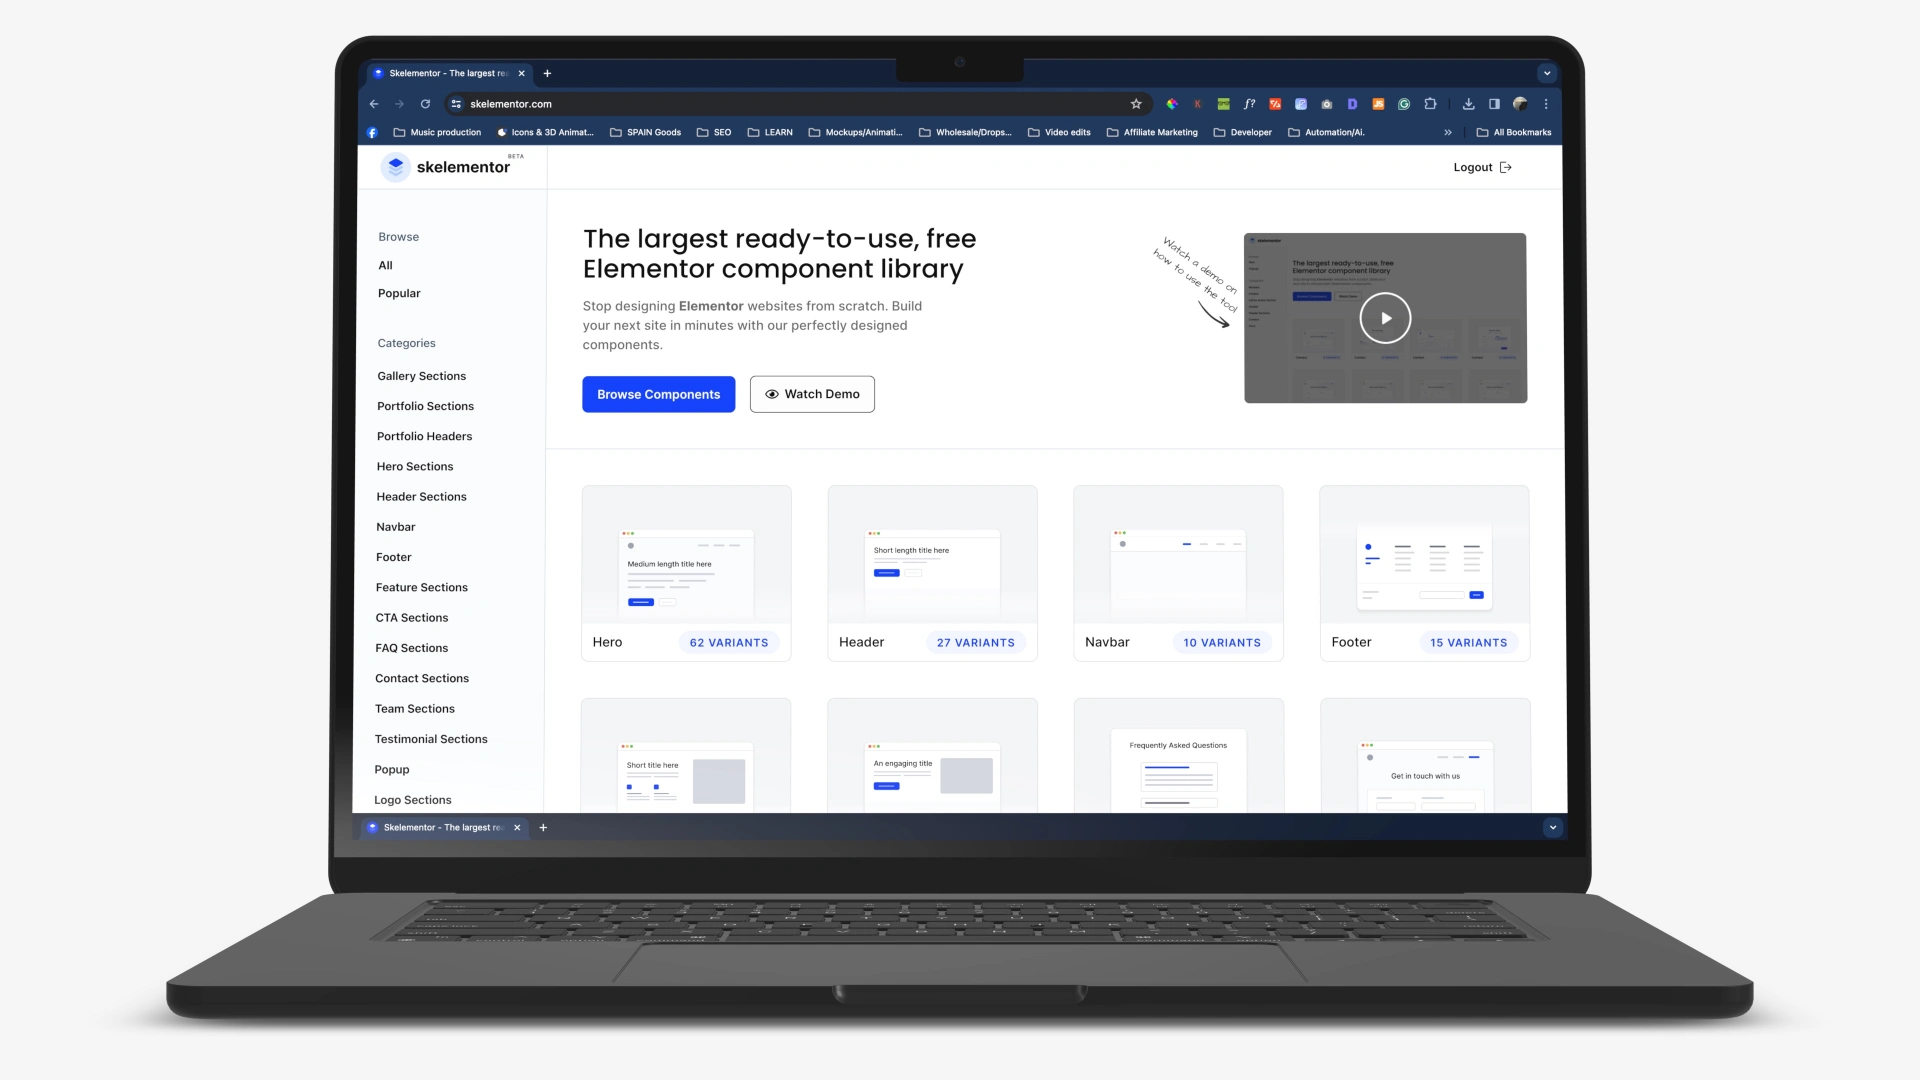
After you’ve created your account, you now have access to a library of sections that will help you create the layout of your pages.
It has pre-made Navbars, Headers, Footers, Hero sections, Popups, Team sections, Review sections, and more. Essentially, everything you need to create your website from scratch!
And, all you have to do to is copy and paste! That easy!
Copy your sections from Skelementor
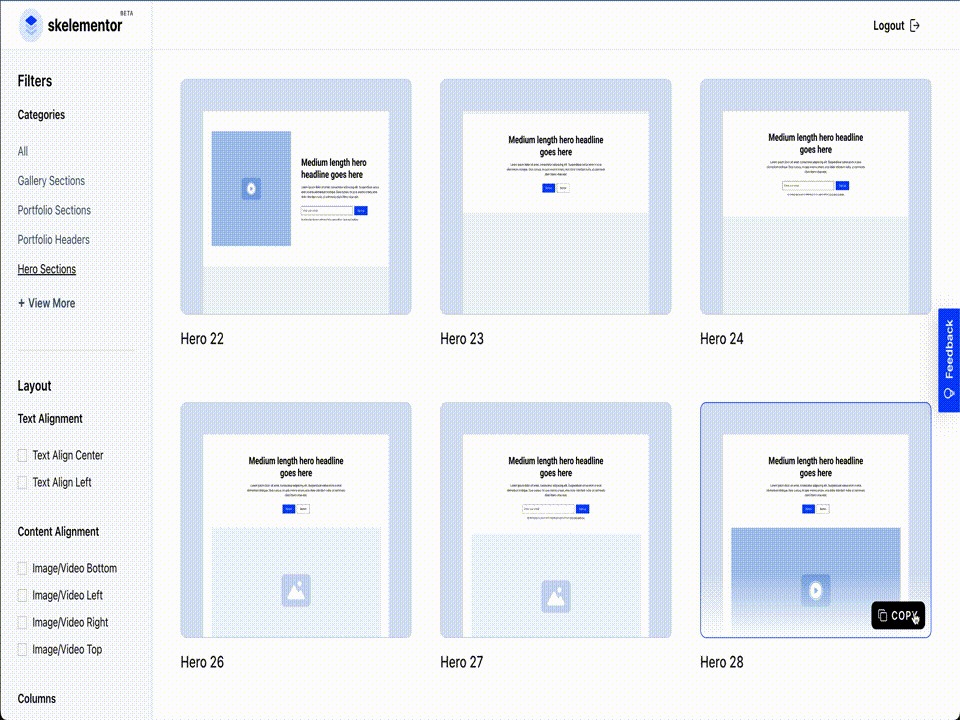
Right click, select “paste from other site” and then “CMD/CTR – V”.
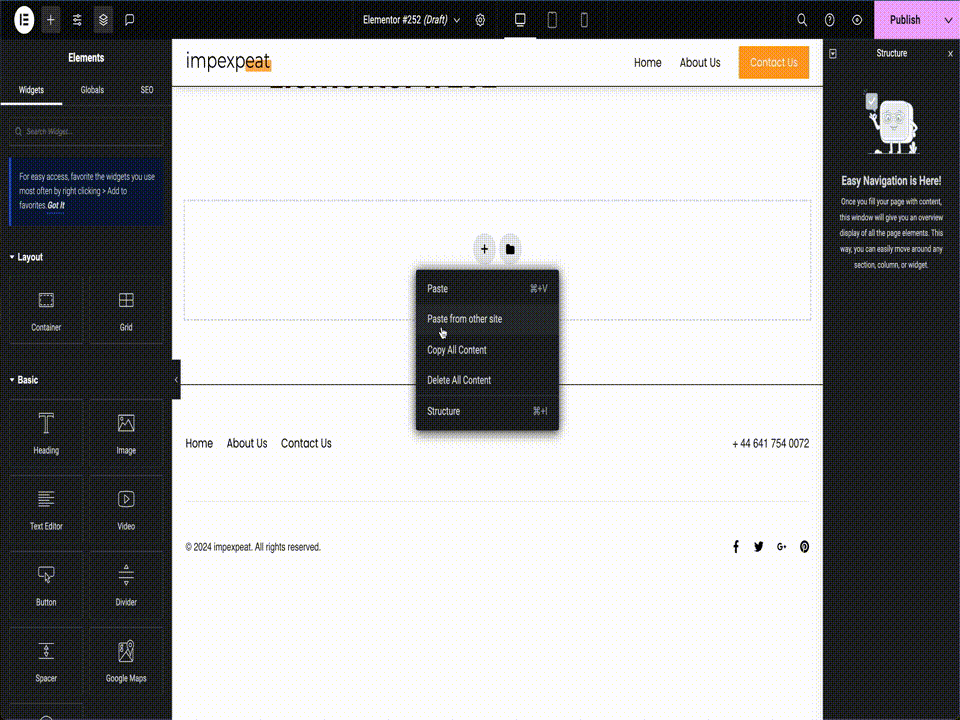
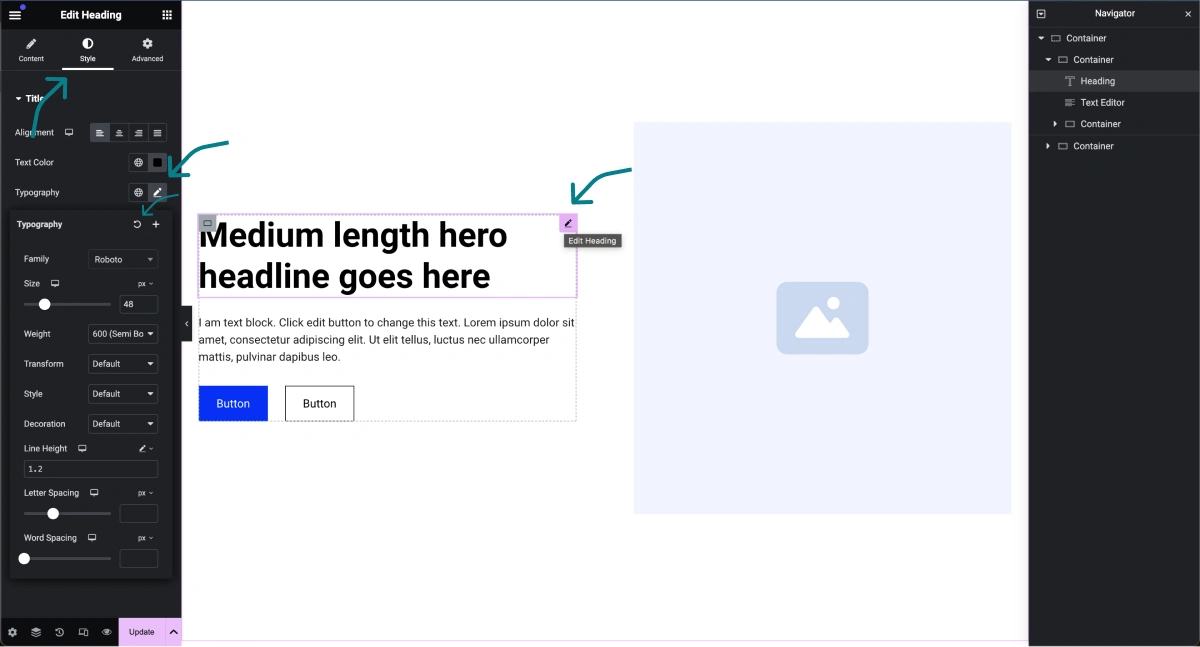
Important: There is one little issue when using Skelementor. When you paste sections from Skelementor, the text will retain the font styling from Skelementor. All you have to do is re-apply your styling (the ones we set previously) by resetting them.
Click on “Edit Heading”, go to the “Style” tab, click on the “Typography” icon and hit the reset button. Do the same for the “Text Color” and for the rest of the heading and text widgets.
You keep doing this until you finally have created the first full page of your website. Continue to do this for the rest of your website pages, and you will have a responsive website in no time!
Important: Please make sure to check all of your viewports (tablet and mobile).
Lastly, for the easy part. Replace the images with your own images!
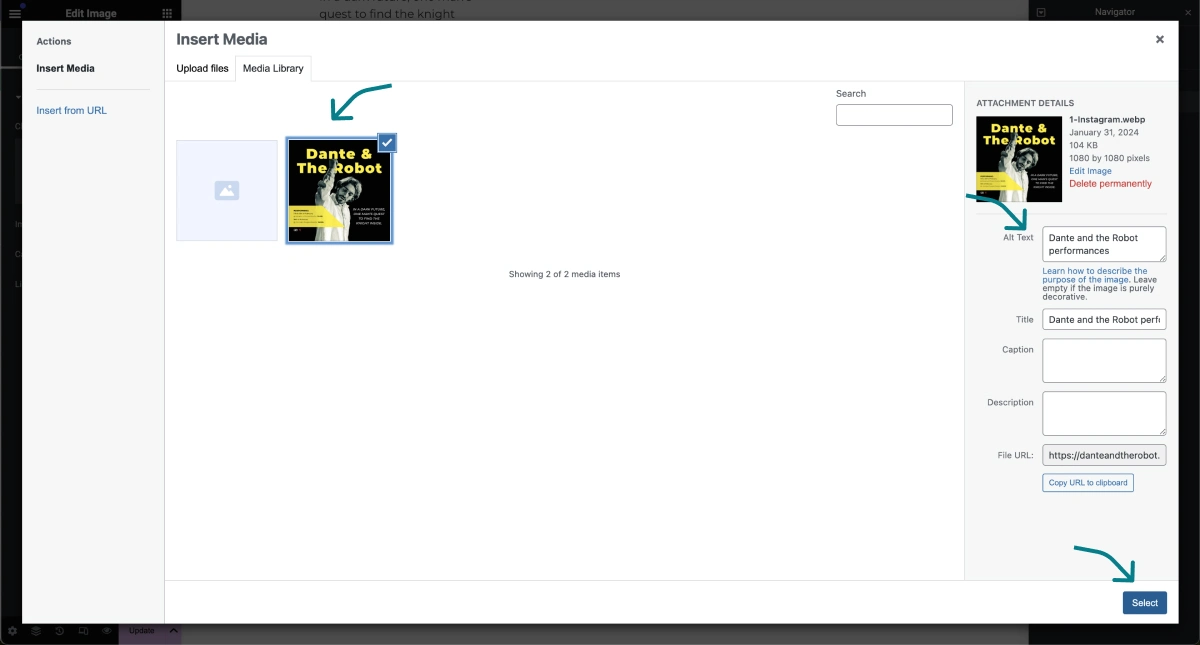
Click on the image box and click “Choose Image”
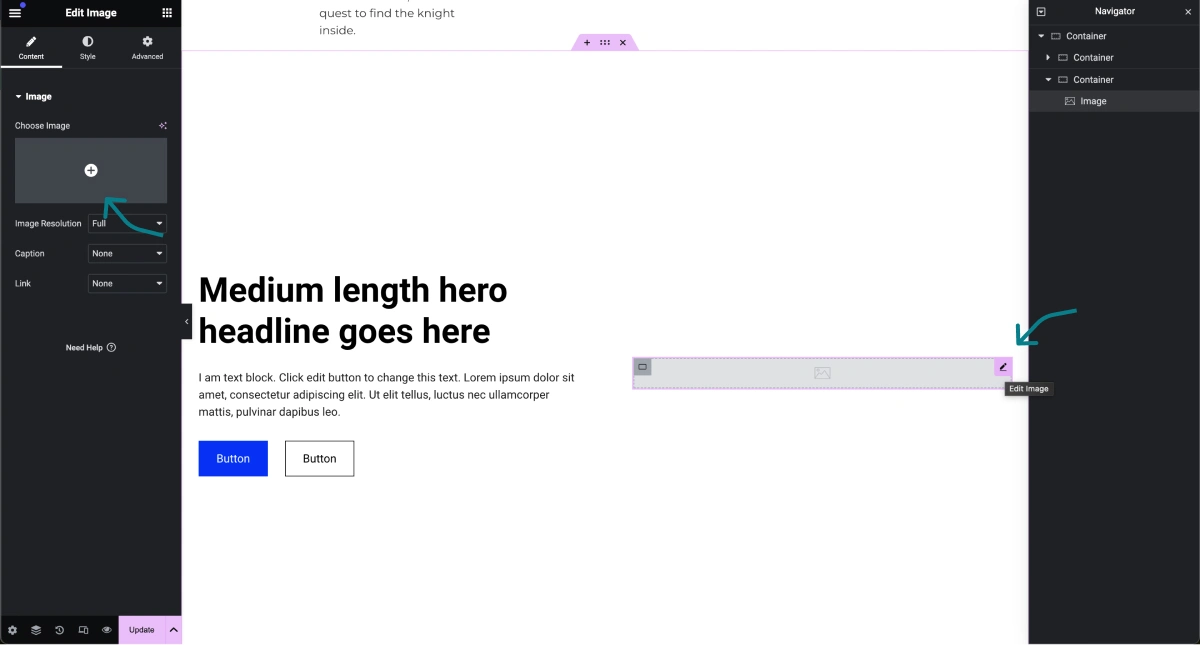
Select and image you would like to replace it with. If you do not have any images uploaded, then upload some images!
Pro tip: When uploading your new images, it is important to upload them with the lowest possible file size and in the correct format. The best website image format is WEBp.
To change the format and compress your large images in bulk, use my free tool. Here’s how:
Make sure you are on the tab “Any to WEBP” and upload as many images you need.

Use the toolbar to adjust the quality of you image. “Lowest” means lowests quality (smaller image size) and “Highest” means highest quality (larger image size).
Note: if your image size is very large (10MB or over), you may want to consider reducing the dimensions using a tool like Canva or Figma.
Try to keep your images under 120kB and make sure you do this for all your images.
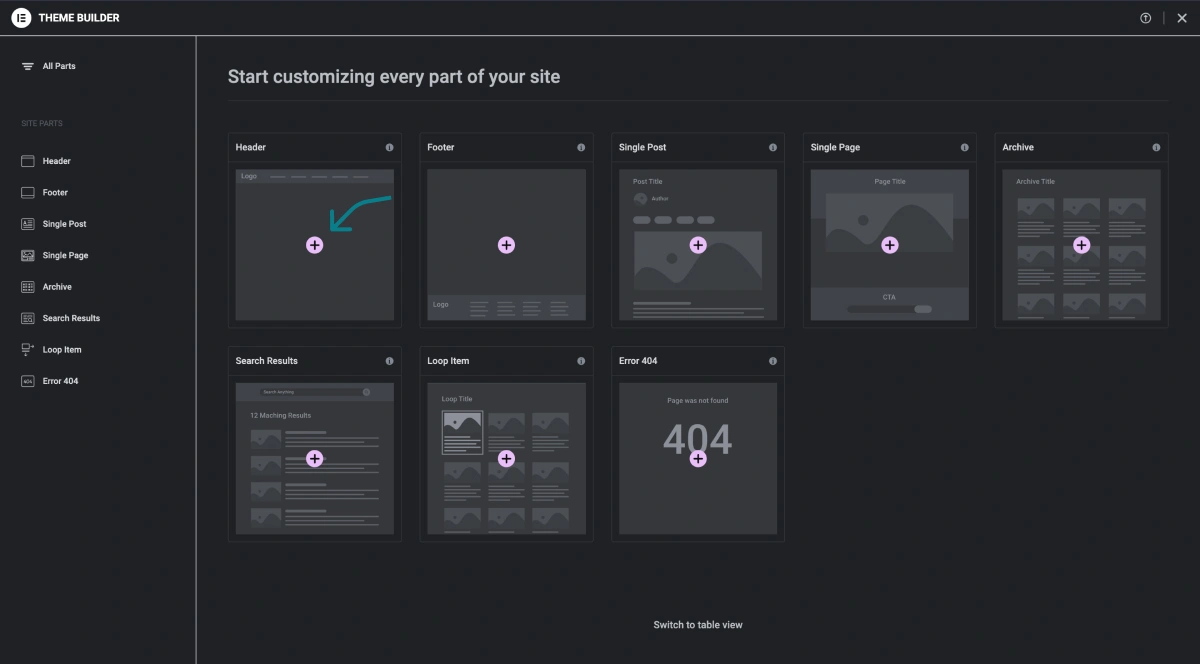
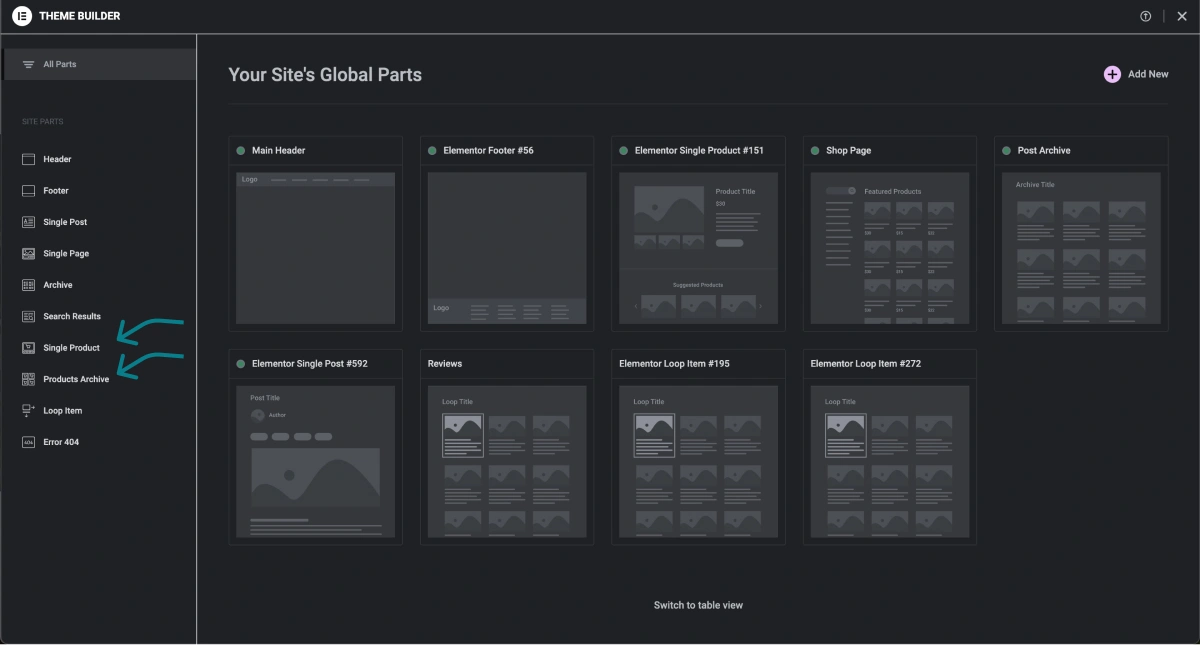
Elementor Pro Theme Builder
This is one of the most important areas when editing your website with Elementor Pro. The “Theme Builder” is where you will create and edit your essential pages and sections such as your Shop page, Header and Footer, Single Blog posts, archives, and others.
To find it, go to your WordPress dashboard. Head over to “Elementor” -> click on “Theme Builder”.
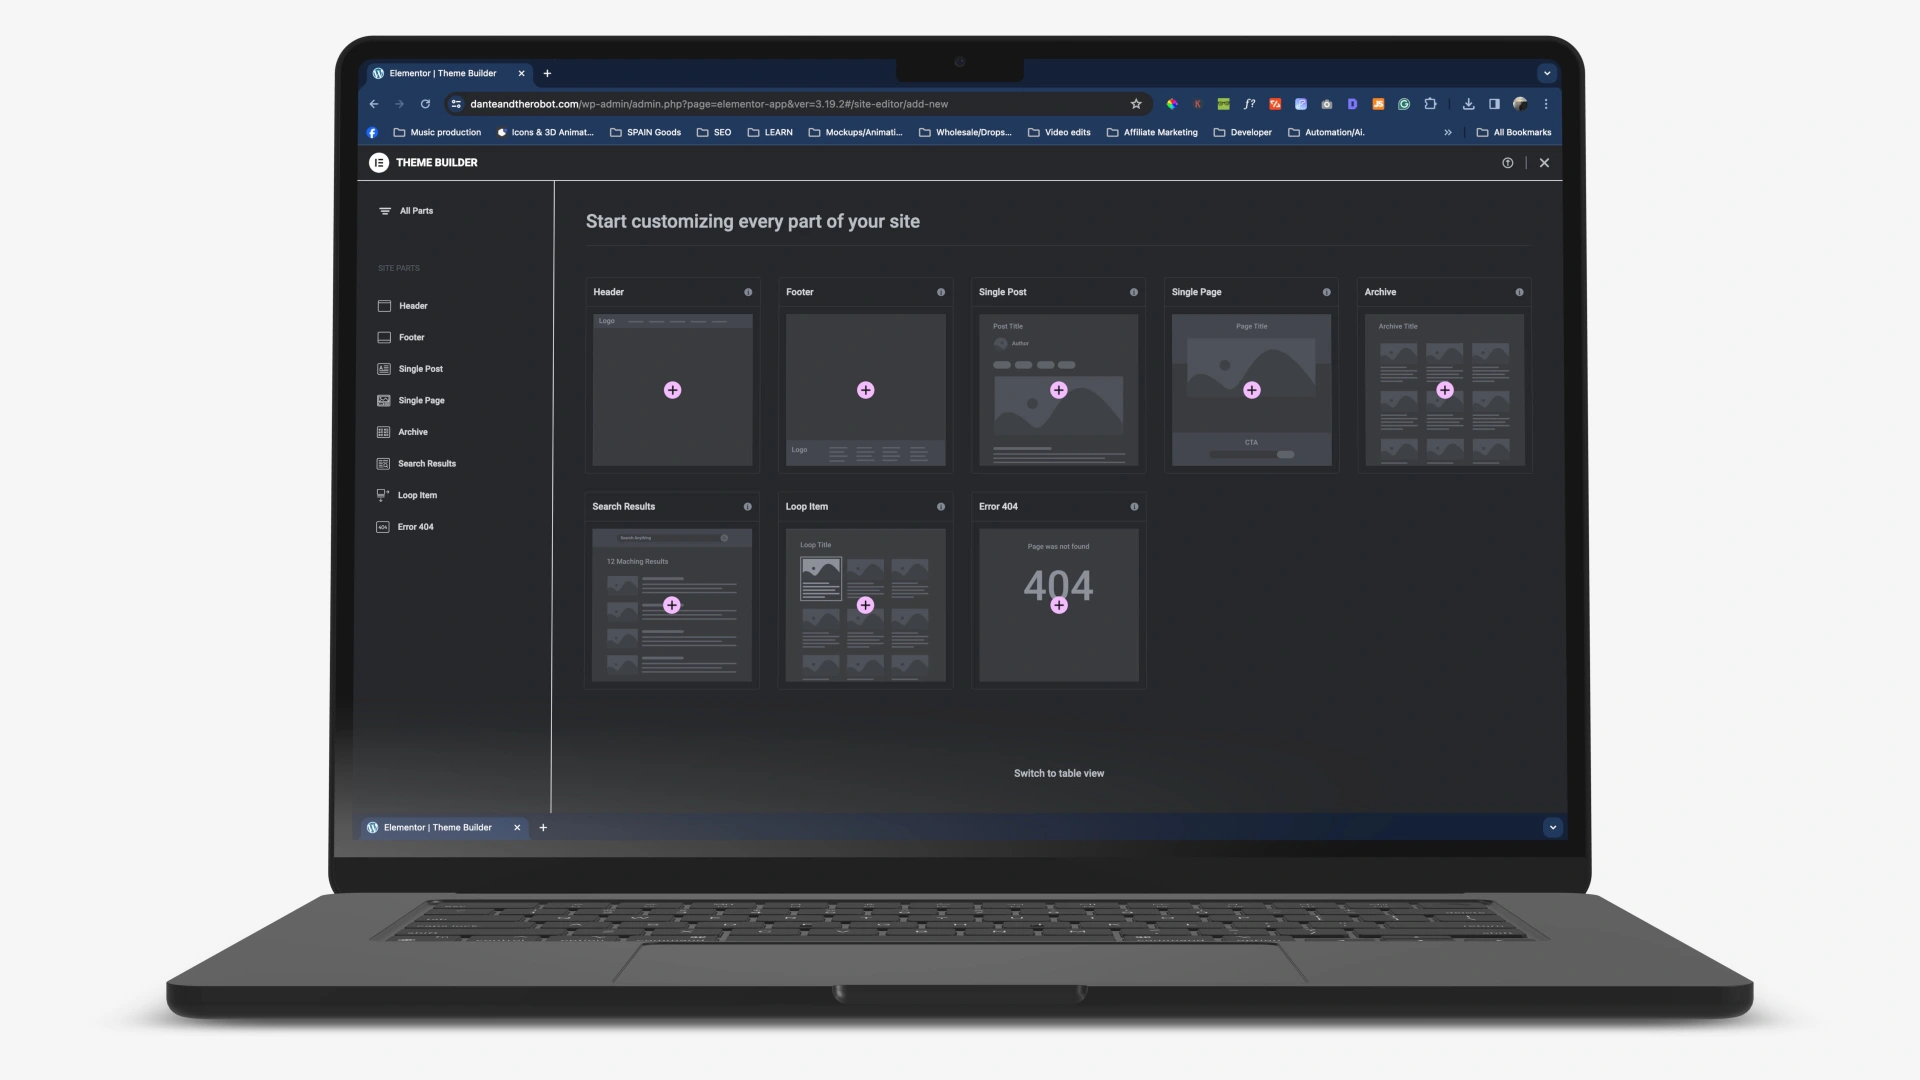
Here you will have the option to edit your Header, Footer, and Single pages like the blog posts and Shop page.
The Theme Builder is essentially the backbone of your Elemntor Pro website.
Make sure to edit all of these pages.
Header: This is the element at the very top of every page and will serve as the primary form of navigation. It should only include the most important pages like Home, Shop/Portfolio, Contact, and About.
Learn how to create a fancy and responsive website navbar ⇒
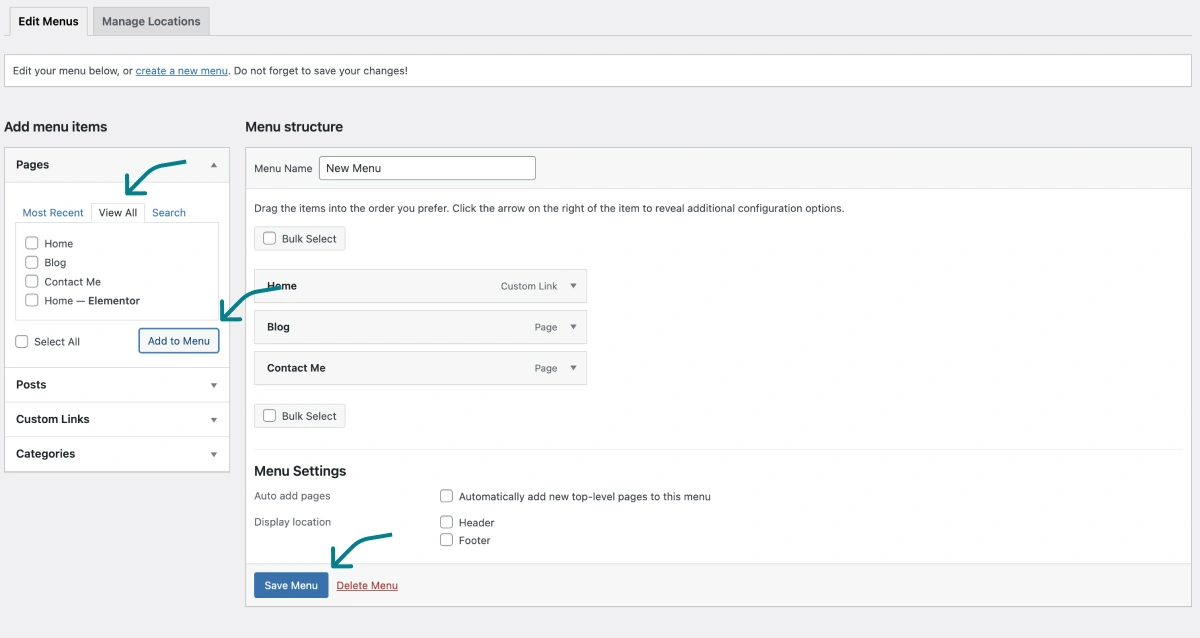
Before building a header, you have to create a WordPress menu.
In your WordPress dashboard. Click on “Appearance” -> “Menus”.
Create a new menu. Give it a name -> click “Create Menu”.
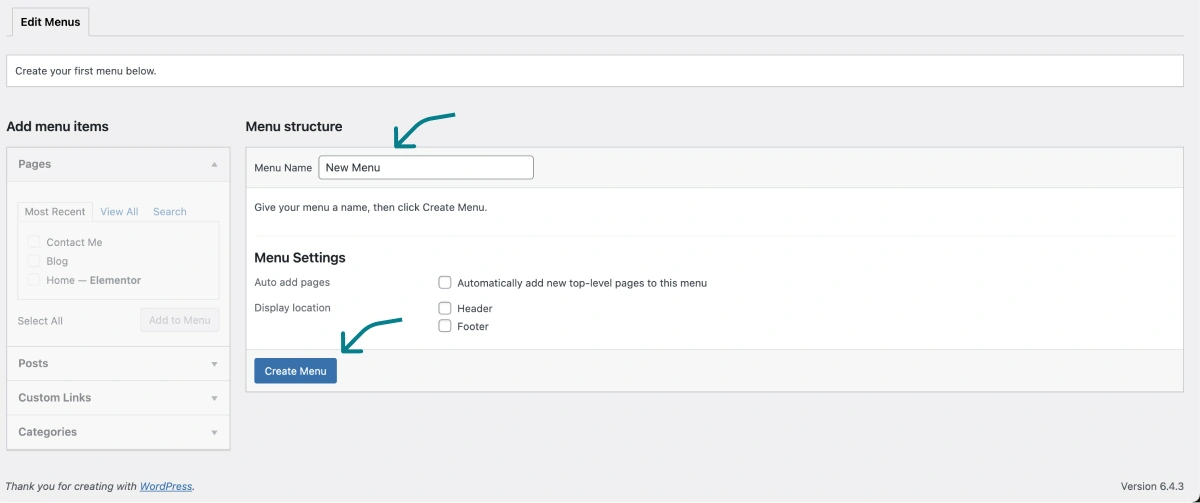
Select your menu items (pages) you wich to include in the menu and “Save Menu”.
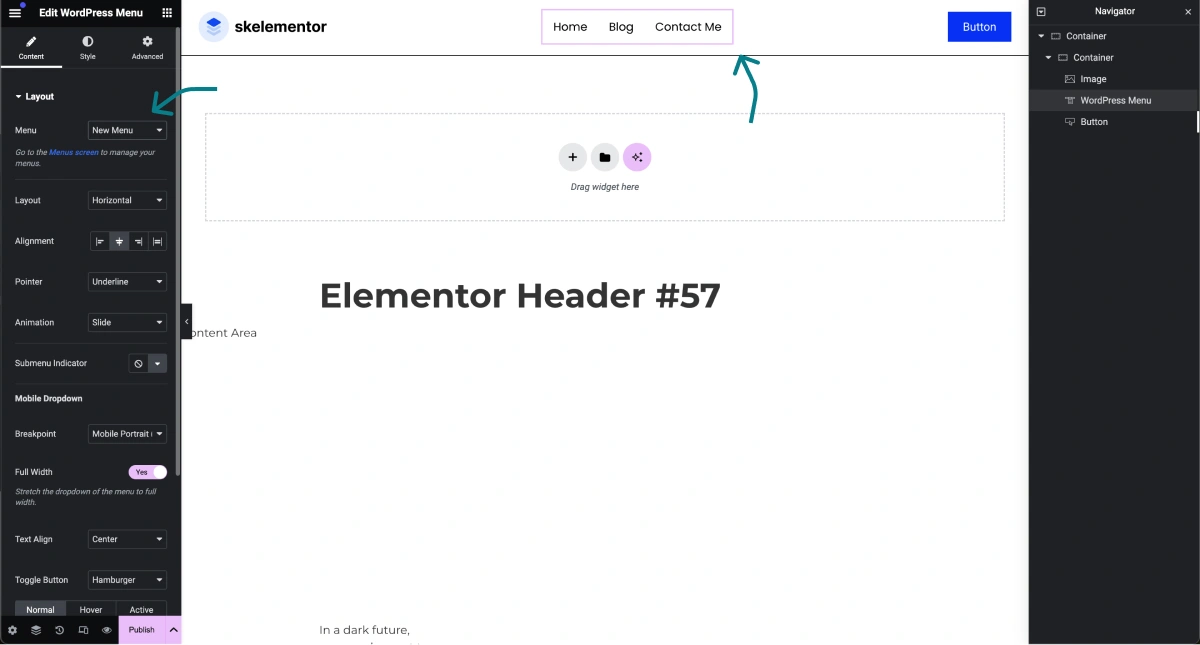
Now, you need to add this menu to your “header” section on your website using the ELementor Pro “Theme Builder”
Head back to your “Theme Builder” and click “Header”.
Shortcut: To move around more effectively between areas/pages of your site, use the keyboard shortcut: “CMD/CTR – E” and type in where you want to go next. For example “Theme Builder”. This will take you to the “Theme Builder” page.
Using the same technique to create your pages above, create your header. Make sure to include the “WordPress Menu” widget and replace it with the menu you just created.
Select the menu widget -> select the menu you just created.
Note: Remember to reset the typography and fonts if you used Skelementor to add your header section.
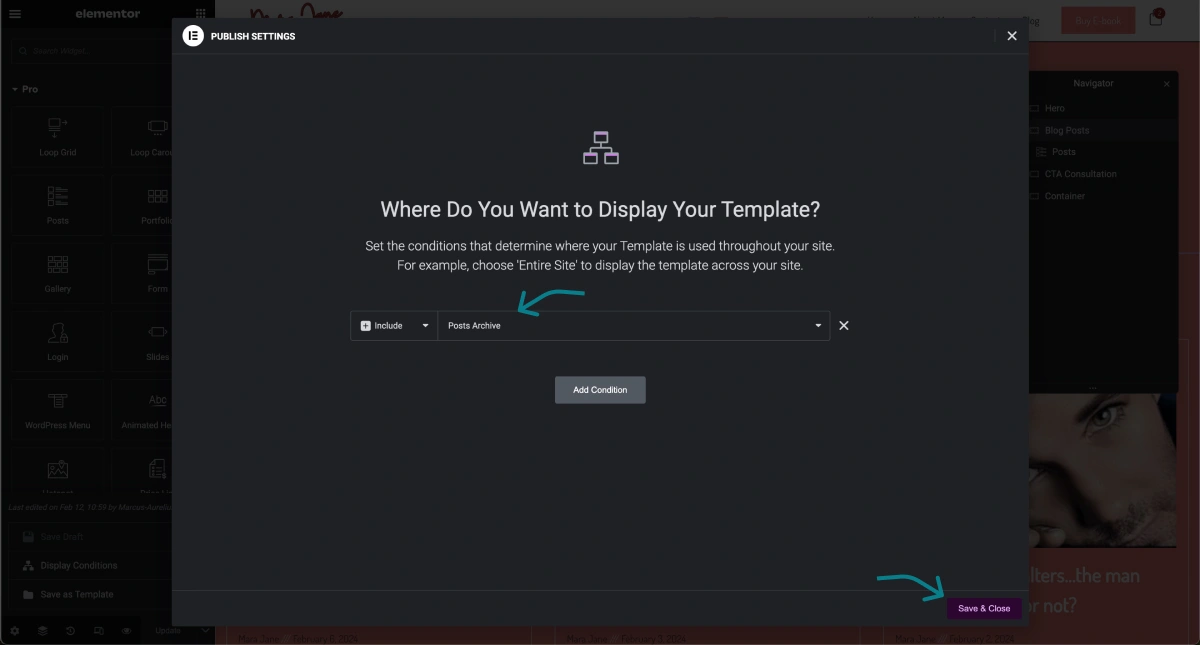
When you are happy with your header design. Hit the “Publish” button and make sure that it is included on your entire site.
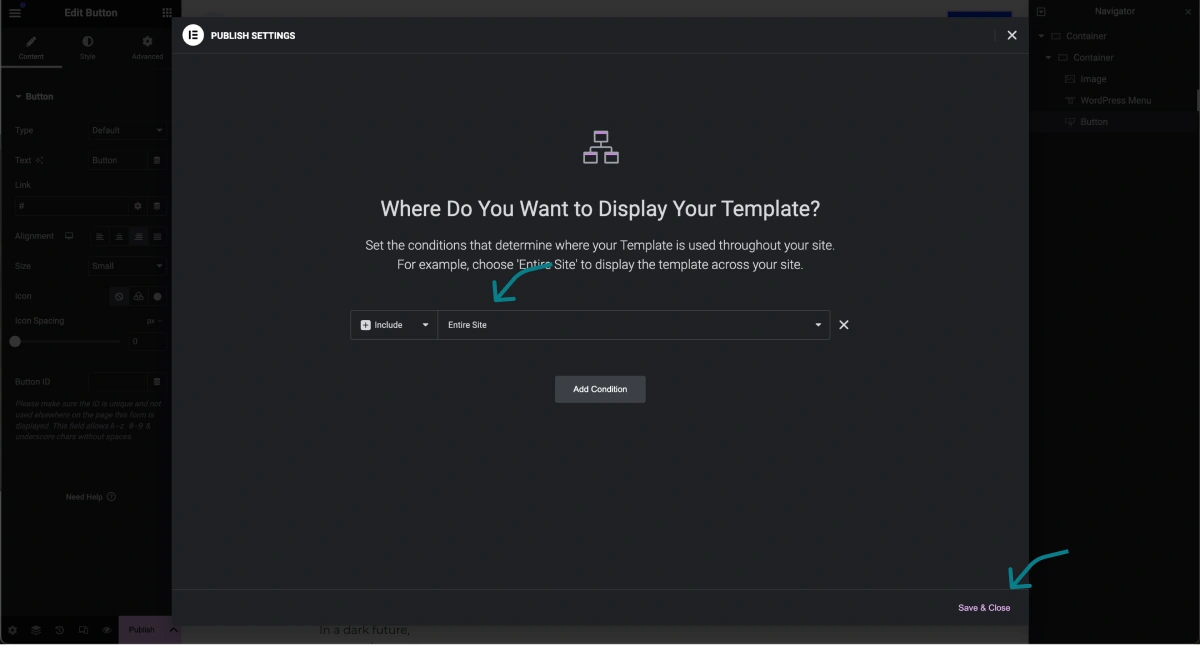
After clicking “Publish” -> “Add Condition”.
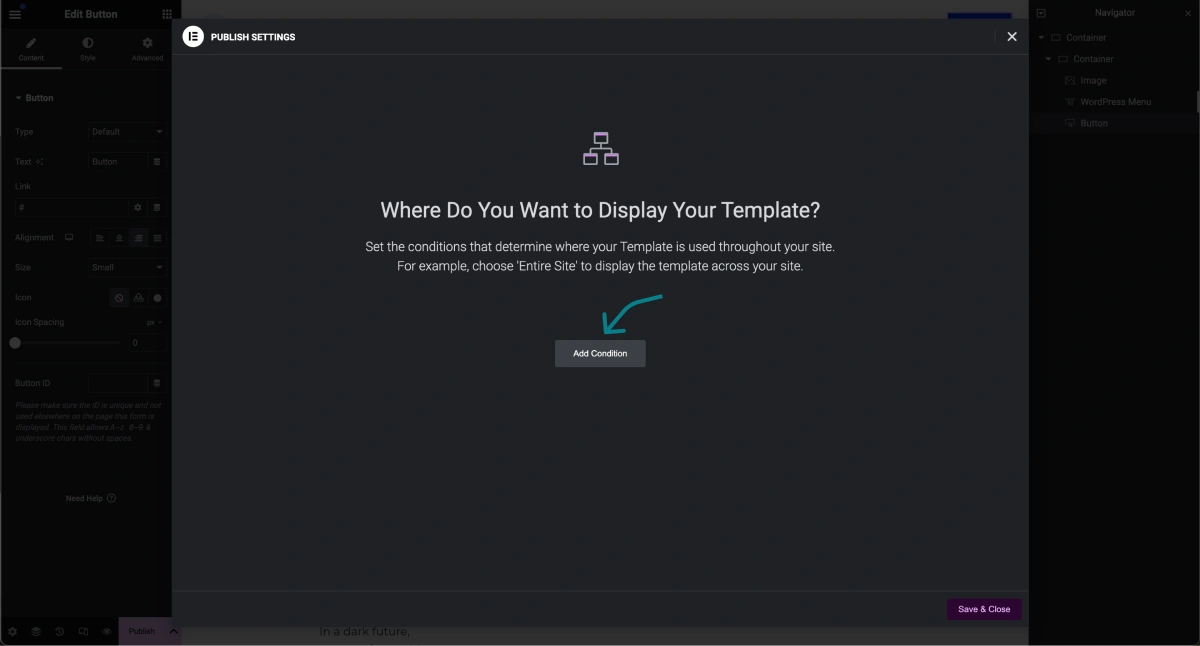
Make sure to select “Entire Site” -> “Save & Close”.
Footer: Similarly to the Header, this is present at the very bottom of your site and also will appear everywhere on your site.
To create a Footer, it is the same process as the Header.
Go back the the dashboard -> create a new menu -> this time call it Footer Menu -> make sure to include all the pages -> add this menu when you create the Footer section in the “Theme Builder”.
Single Post: This is the page template that will be used for every blog post you create.
Add a new “Single Post” page.
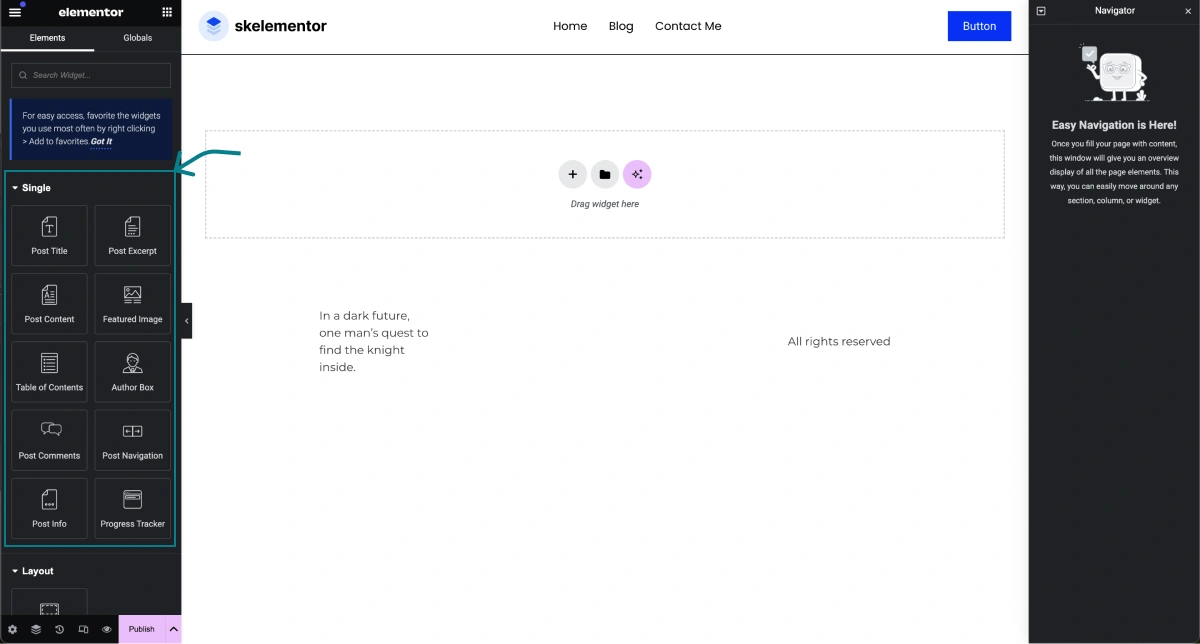
Note: When editing this page, Elementor Pro makes it easy. It provides you with the essential parts of your blog posts like the “Post Title”, “Featured Image”, “Post Content”, “Table of Contents” etc.
All you have to do now is drag and drop in the order you wish to display these items.
You may want to add a few blog posts (if you haven’t already) in the “Posts” section of your WordPress dashboard. Just so you can see what you are doing when editing the “Posts” and “Post Archive” pages.
Important: Remember to first add a “Container” widget and then your pots widgets.
If you are stuck and not sure in what order to place your post widgets, look for inspiration on popular websites like Forbes.com or Vice.com. Have a look at their single post page and copy their structure for the best results.
Archive: This is the page template that Elementor will assign to your blog page and category pages.
Create a new “Archive” page -> add the design elements you wish to add like a hero section (title and subtitle). And add your “Post” widget.
Once finished, assign it to your “Post Archive” -> then “Save & Close”.
Single Product and Product Archive: If you are building an E-commerce store (online shop), you will have two extra options. Similarly to the “Single Post”, the “Single Product” is the page template dedicated to all of your products.
And similarly to the standard “Archive” page, the “Product Archive” is for your product catalog page.
Editing your Theme Builder in Elementor Pro is one of the most important steps in creating a beautiful and functional website so make sure to spend most of your time here. Take the time to create each page required.
6. Adding Essential Plugins
Plugins are one of the key advantages of using WordPress. They allow you to add new features and functionality to your website without any programming knowledge.
Adding plugins is super simple and you will only need 1 or 2.
Understanding the Role of Plugins
Plugins enhance your website by simplifying the addition of crucial features, making it more functional and user-friendly.
Key benefits include:
- SEO Optimization: Plugins like Rank Math help improve your site’s visibility on search engines, leading to better organic search results.
- Speed Enhancements: LiteSpeed Cache optimizes website performance, reducing loading times and improving the user experience.
- Analytics: While I recommend using Google Analytics for tracking your site data and user engagement, it can be overwhelming to use as a beginner. So you can download a plugin like Independent Analytics which is free to use.
Incorporating these plugins can significantly boost your website’s efficiency and search engine ranking.
Essential Plugins You Should Download
When building your website, whether it be a personal portfolio, an E-commerce store, or a blog site, you only need a few extra plugins.
If your hosting provider is good (like the ones recommended above) there is no need to overdo it with security or other unnecessary plugins that in the end, will only slow your website down…
So, consider incorporating the following essential plugins:
- Rank Math: This is an all-in-one SEO plugin that will automatically connect your site with your Google Analytics and Google Search Console accounts. It will also help with SEO meta headings and descriptions.
- LiteSpeed Cache: This will enhance the speed of your website.
- Independent Analytics: This is the best analytics plugin for WordPress sites. If you (like most) want to avoid the complexities of Google Analytics, download Independent Analytics – it’s free!
To install these plugins, simply go to “Plugins” -> “Add New Plugin” -> Search for it -> click “Install Now” -> wait a few seconds and then click “Activate”
It should now be in your “Plugins” section.

7. Configuring Essential Plugins
In terms of configuring your plugins in WordPress, each one has its unique settings and configurations. We could write entire guides for each specific plugin.
So, in order not to drag on too much, I am just going to show you the essential steps you should take for each.
Rank Math
Rank Math is the best plugin for everything SEO-related. It helps connect your Google accounts for analytics and keyword search results, allows you to customize your meta headings and descriptions for visibility, helps you fix any 404 errors on your site, and even provides you with an SEO score that aims at helping you achieve the highest SEO SERP ranks.
Once you have downloaded it, it should appear in your WordPress menu to the left.
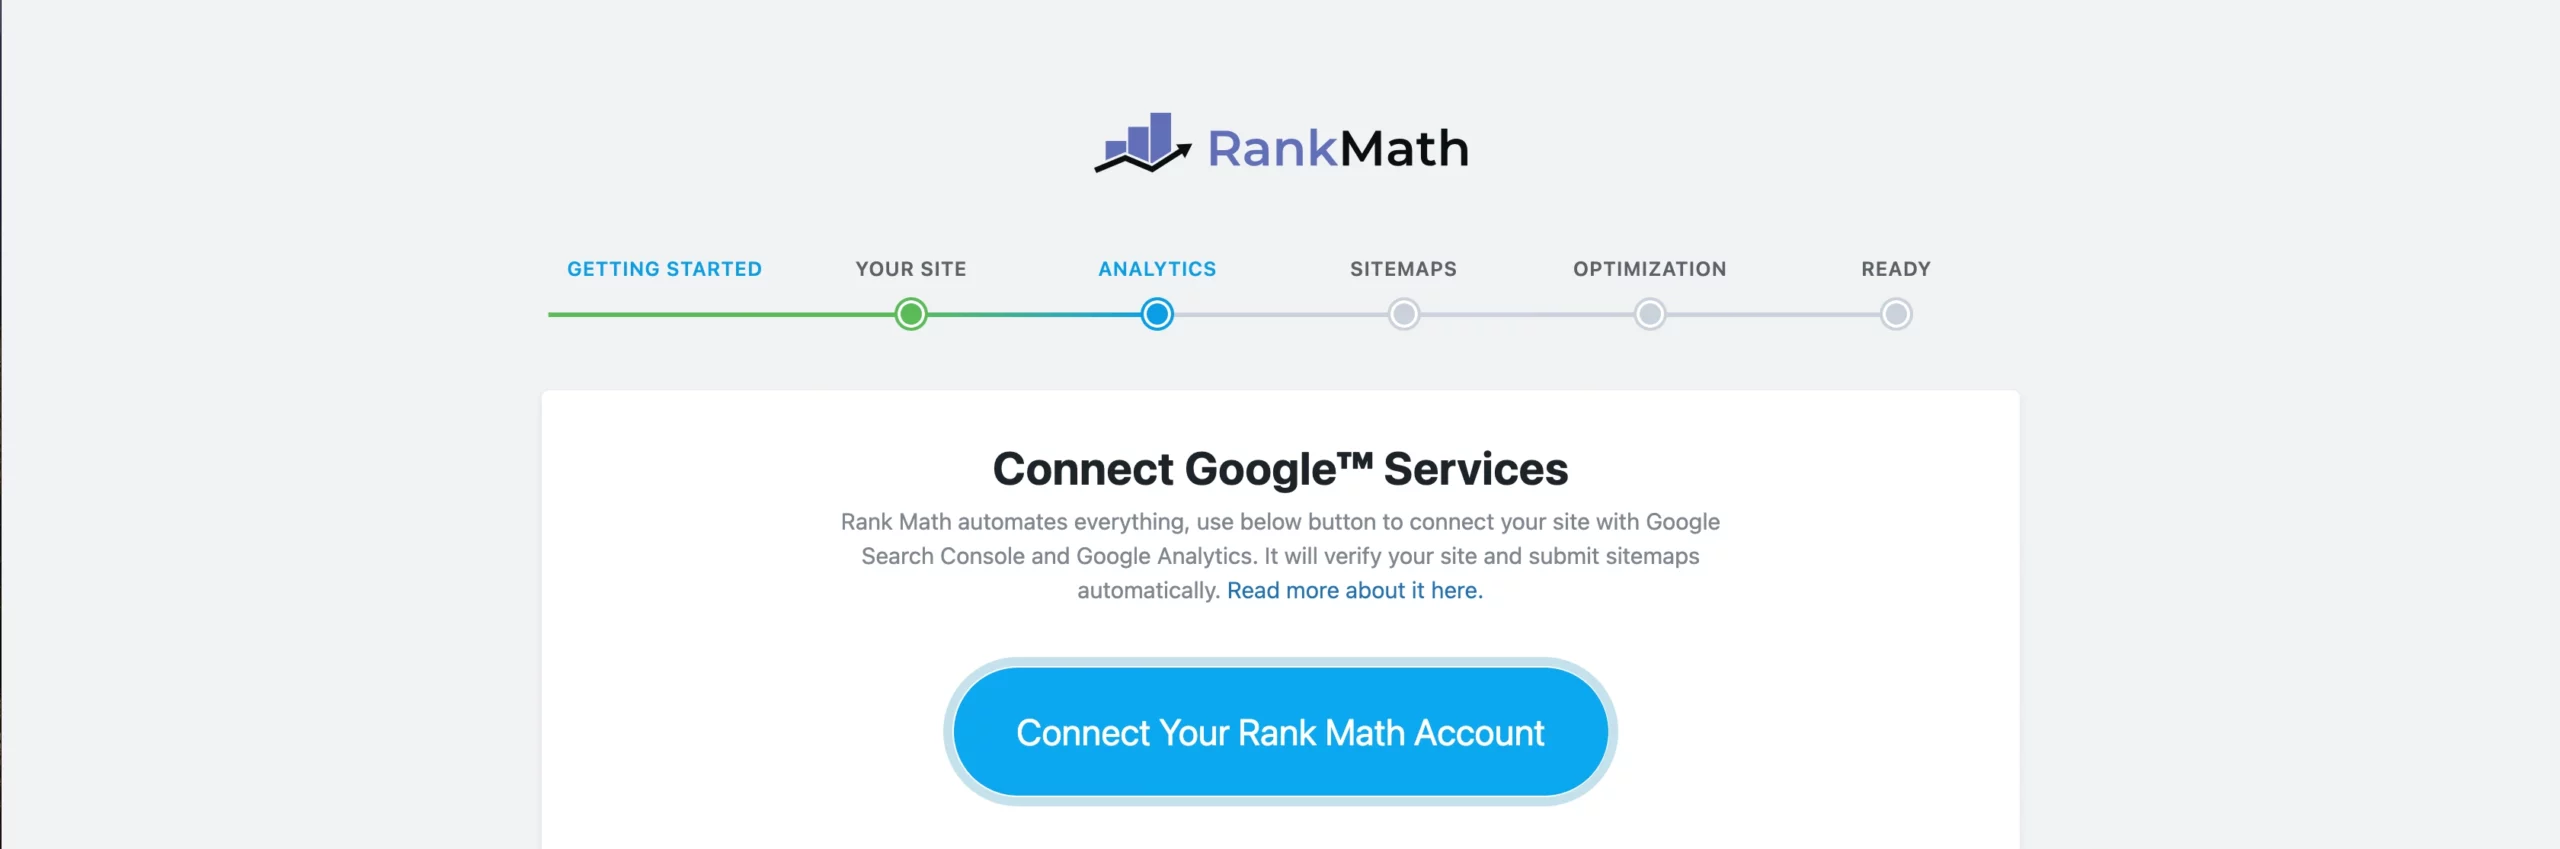
The first thing you should do with Rank Math is head over to the “Setup Wizard”
Note: Before going through the Setup Wizard, make sure to have created an account with Google Analytics and Google Search Console. It’s easy as long as you already have a Google account.
Click on “Rank Math SEO” -> “Dashboard” -> “Setup Wizard”
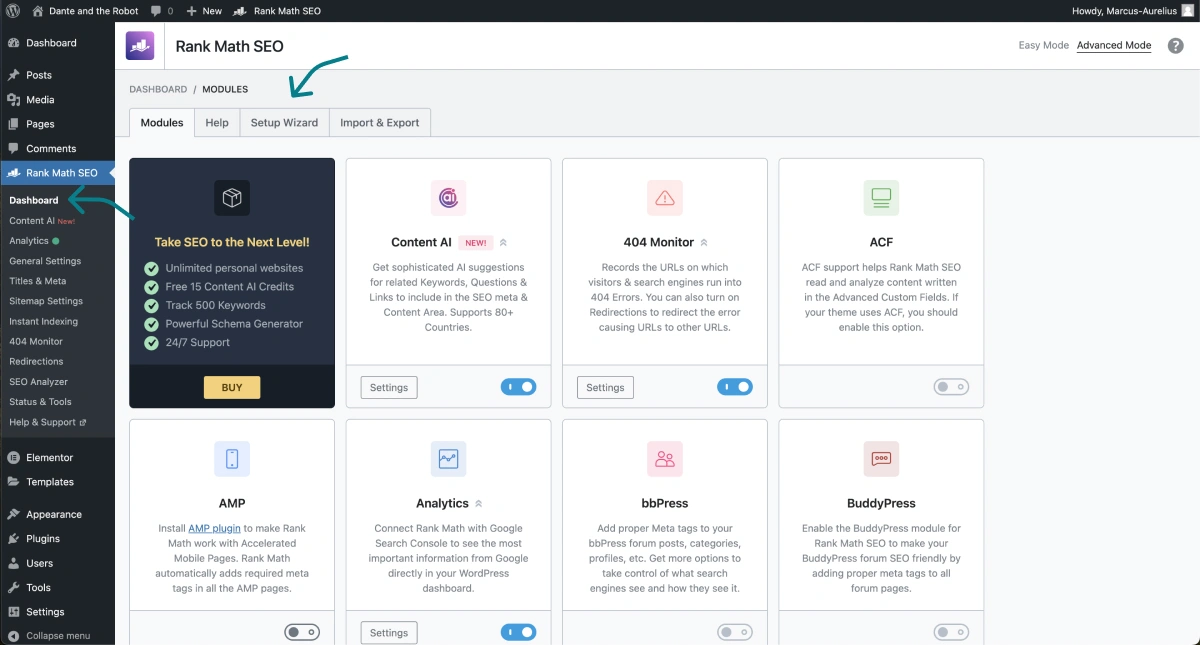
Once in the “Setup Wizard”, you can select the “Easy” setting and click the button “Setup Wizard”
Follow the steps and finally connect your Google account.
Continue with the setup and you are pretty much done with the Rank Math configuration plugin. If you want to go in deeper with Rank Math, visit their tutorial on their site.
LiteSpeed Cache
LiteSpeed Cache is one of the best available plugins to enhance your website speed. It has many advanced features that will further enhance your site speed. But luckily, if you are a beginner, LiteSpeed Cache has some presets available.
After downloading the plugin, head over to the LiteSpeed “Presets” section and apply the “Basic” prest.
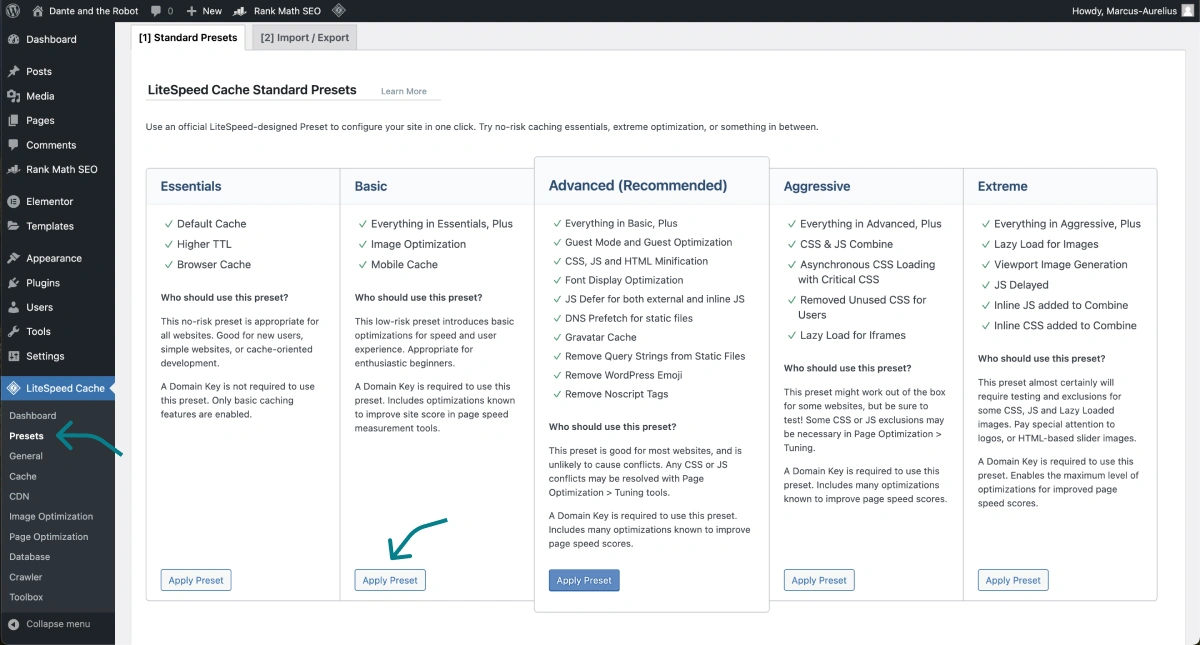
This will only apply basic enhancements to your website. To further enhance your website, I would suggest investigating online and learning as much as you can regarding LiteSpeed Cache and caching in general.
*Caution: Caching options can negatively alter your website if you do not know what you are doing. Which is why, we only applied the “Basic” preset.*
Full tutorial: 6 Ways to boost your Elementor Pro site speed ⇒
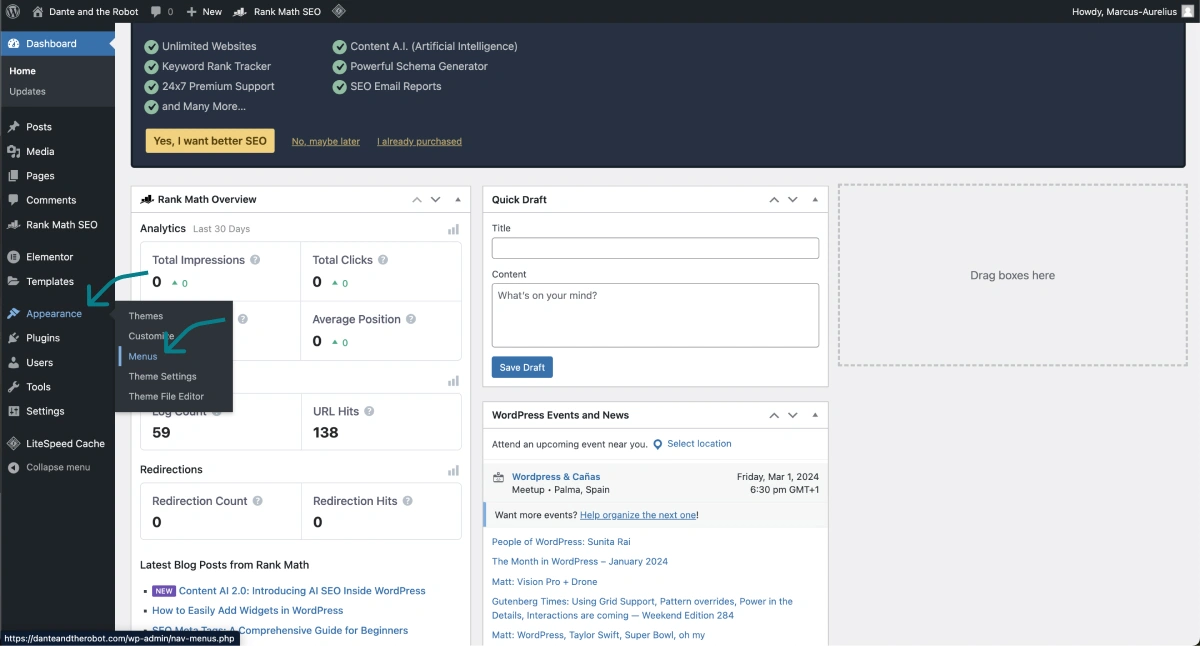
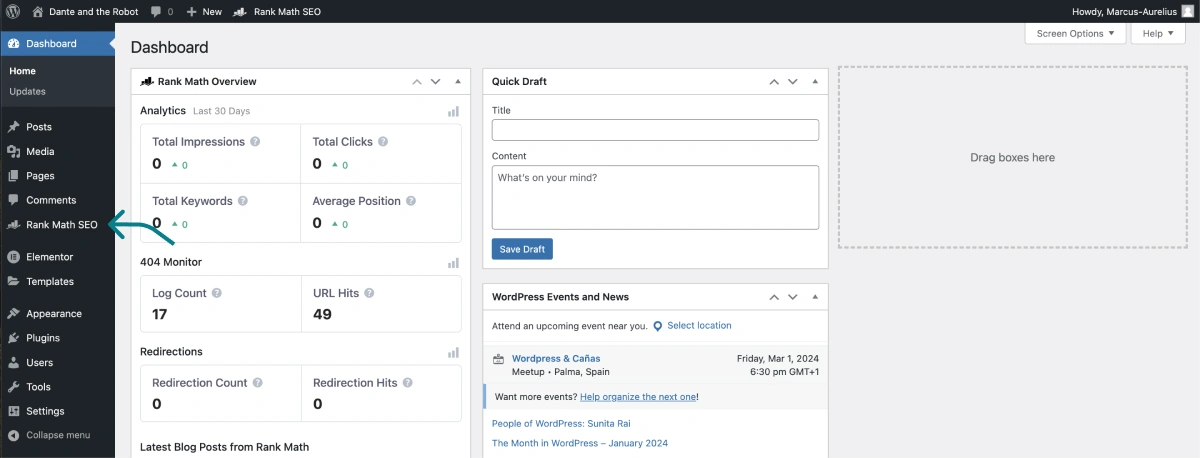
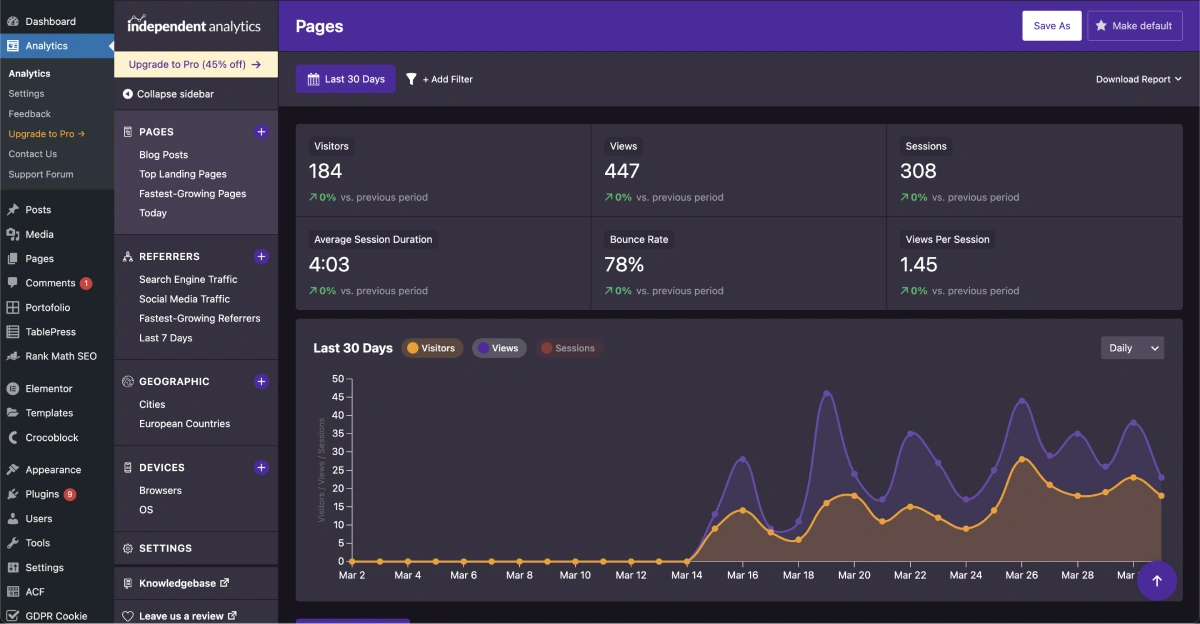
Independent Analytics
Independent Analytics is a great analytics plugin that provides you with all your essential tracking.
It comes with a paid plan where you can set campaigns for link and button tracking, and use their WooCommerce features. But, as a start, you can use their free version.
This is what the dashboard looks like (dark mode):
8. Launching Your Website
After customizing your website, enhancing its functionality, and optimizing it for search engines, it’s time to launch it. In this section, we will explore the pre-launch checklist for your website and how to announce your website launch.
Pre-Launch Checklist for Your Website
Before launching your website, make sure to go through this checklist to ensure everything is in order:
- SSL certificate: At the very least, you should have installed the free version “Let’s Encrypt” when you bought your hosting. Your domains should have https:// and not http:// – there needs to be an “s” there.
- Page speed: Dig deeper into LiteSpeed Cache. You can test your website for speed using Page Speed Insights and the Solar Winds speed test tool.
- Images: Make sure that all images you uploaded are both in the next-gen format (WEBp) and under 120kB.
Consider these factors before launching your website, ensuring a seamless online presence.
Announcing Your Website Launch
- Create a buzz around your website launch by posting about it on social media platforms, such as Facebook, Twitter, or LinkedIn.
- Implement a strategic email marketing campaign to inform your existing subscribers about your new website and encourage them to visit it.
- Announce your website launch through a blog post, sharing the news, showcasing what visitors can expect, and providing a link to your website.
- Share your website launch news through your social media accounts, announcing it multiple times to reach a wider audience.
- Utilize SEO strategies, such as optimizing your website’s content and meta tags, to ensure search engines index your website and display it in search results.
- By announcing your website launch through various channels, you can generate excitement, attract visitors, and build an initial audience for your website.
See how to embed your Instagram feed into your website site ⇒
Maintaining and Updating Your Website
Creating a website is not a one-time task; it requires some ongoing maintenance and updates.
Regularly Updating Your Content
One of the keys to a successful website is regularly updating its content. By publishing new blog posts, articles, or other forms of content, you keep visitors engaged and encourage them to return to your website.
Regular content updates also help maintain a high ranking in search engine results, as search engines favor fresh and relevant content. Develop a content strategy that includes a content calendar, keyword research, and audience targeting to optimize your content creation process and attract organic traffic.
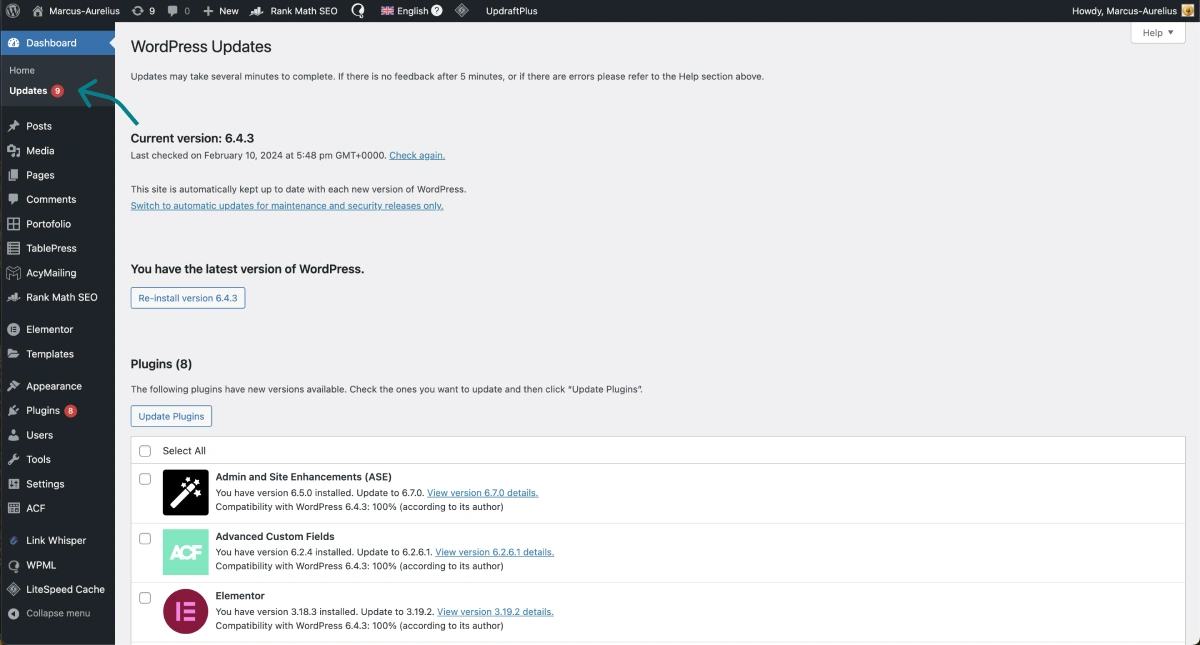
Make sure to only update your website plugins once a year or every 6 months.
To update your plugins go to the WordPress “Dashboard” -> “Updates”.
When updating your plugins, try to update one at a time while at the same time, checking the front end (your actual live site) to make sure nothing breaks.
In case you do find any issues, remember that your hosting provider keeps backups of your site every 28 – 30 days.
How Long Does This All Take?
Once you become a pro, you will probably accomplish a full website in about a week. If you are a beginner, it could take a month or two. But, if you follow this guide step-by-step, you could very well take the same amount of time a professional web developer would take to build a website from scratch.
Conclusion
Creating a website from scratch may seem like a daunting task, but with the right tools and guidance, it can be a seamless process. Remember to first understand the purpose of your website and determine its goals. Selecting a good domain name is crucial for recoverability. Choose a reliable web host that meets your requirements from the list above.
WordPress is an excellent platform for building and customizing your website. Utilize Elementor Pro to enhance its design and functionality. Incorporate a few essential plugins to optimize your website for search engines. Before launching, ensure a thorough pre-launch checklist and announce your website’s launch to attract visitors.
Update your site once a year and you’re done.
Frequently Asked Questions
What is the most easy way to build a website?
The easiest way to build a website would be using Wix, Squarespace, or Weebly. But these platforms are not worth it in the long run. It’s much better to start with something like WordPress and Elementor, follow a step-by-step guide to help you through the process, and build yourself a real custom website that can perform.
What is the easiest tool to build a website?
When it comes to website building, there are many tools available, but one of the easiest tools to use is a website builder like Elementor Pro. These website builders offer intuitive, drag-and-drop interfaces, and a wide range of pre-designed templates, allowing you to create a website without any coding or design skills. With these tools, you can easily customize your website’s design, add content, and launch your website within a short amount of time.
References
¹ – https://w3techs.com/technologies/details/cm-wordpress